Create Design Plan
Updated
When you enter the Plan Mode, you'll see multiple processes. Each one represents a user flow—a step-by-step path users take when interacting with your product. Think of the user flow diagram as the user journey of your product, outlining the key steps your users go through. Each node under the user flow is a page. Now that you're familiar with nodes and user flow diagrams, let's get started!
1. Generate User Flow Diagram
Auto-generating Core User Flows
Enter a brief description of your idea in the chatbox, and Sketchflow will immediately generate the user flows for your project.
Generating the complete user flow diagram may take a few moments.
You can preview the entire diagram in the right sidebar. It provides a high-level overview of your product's UX hierarchy and helps you quickly locate specific nodes in the left panel.
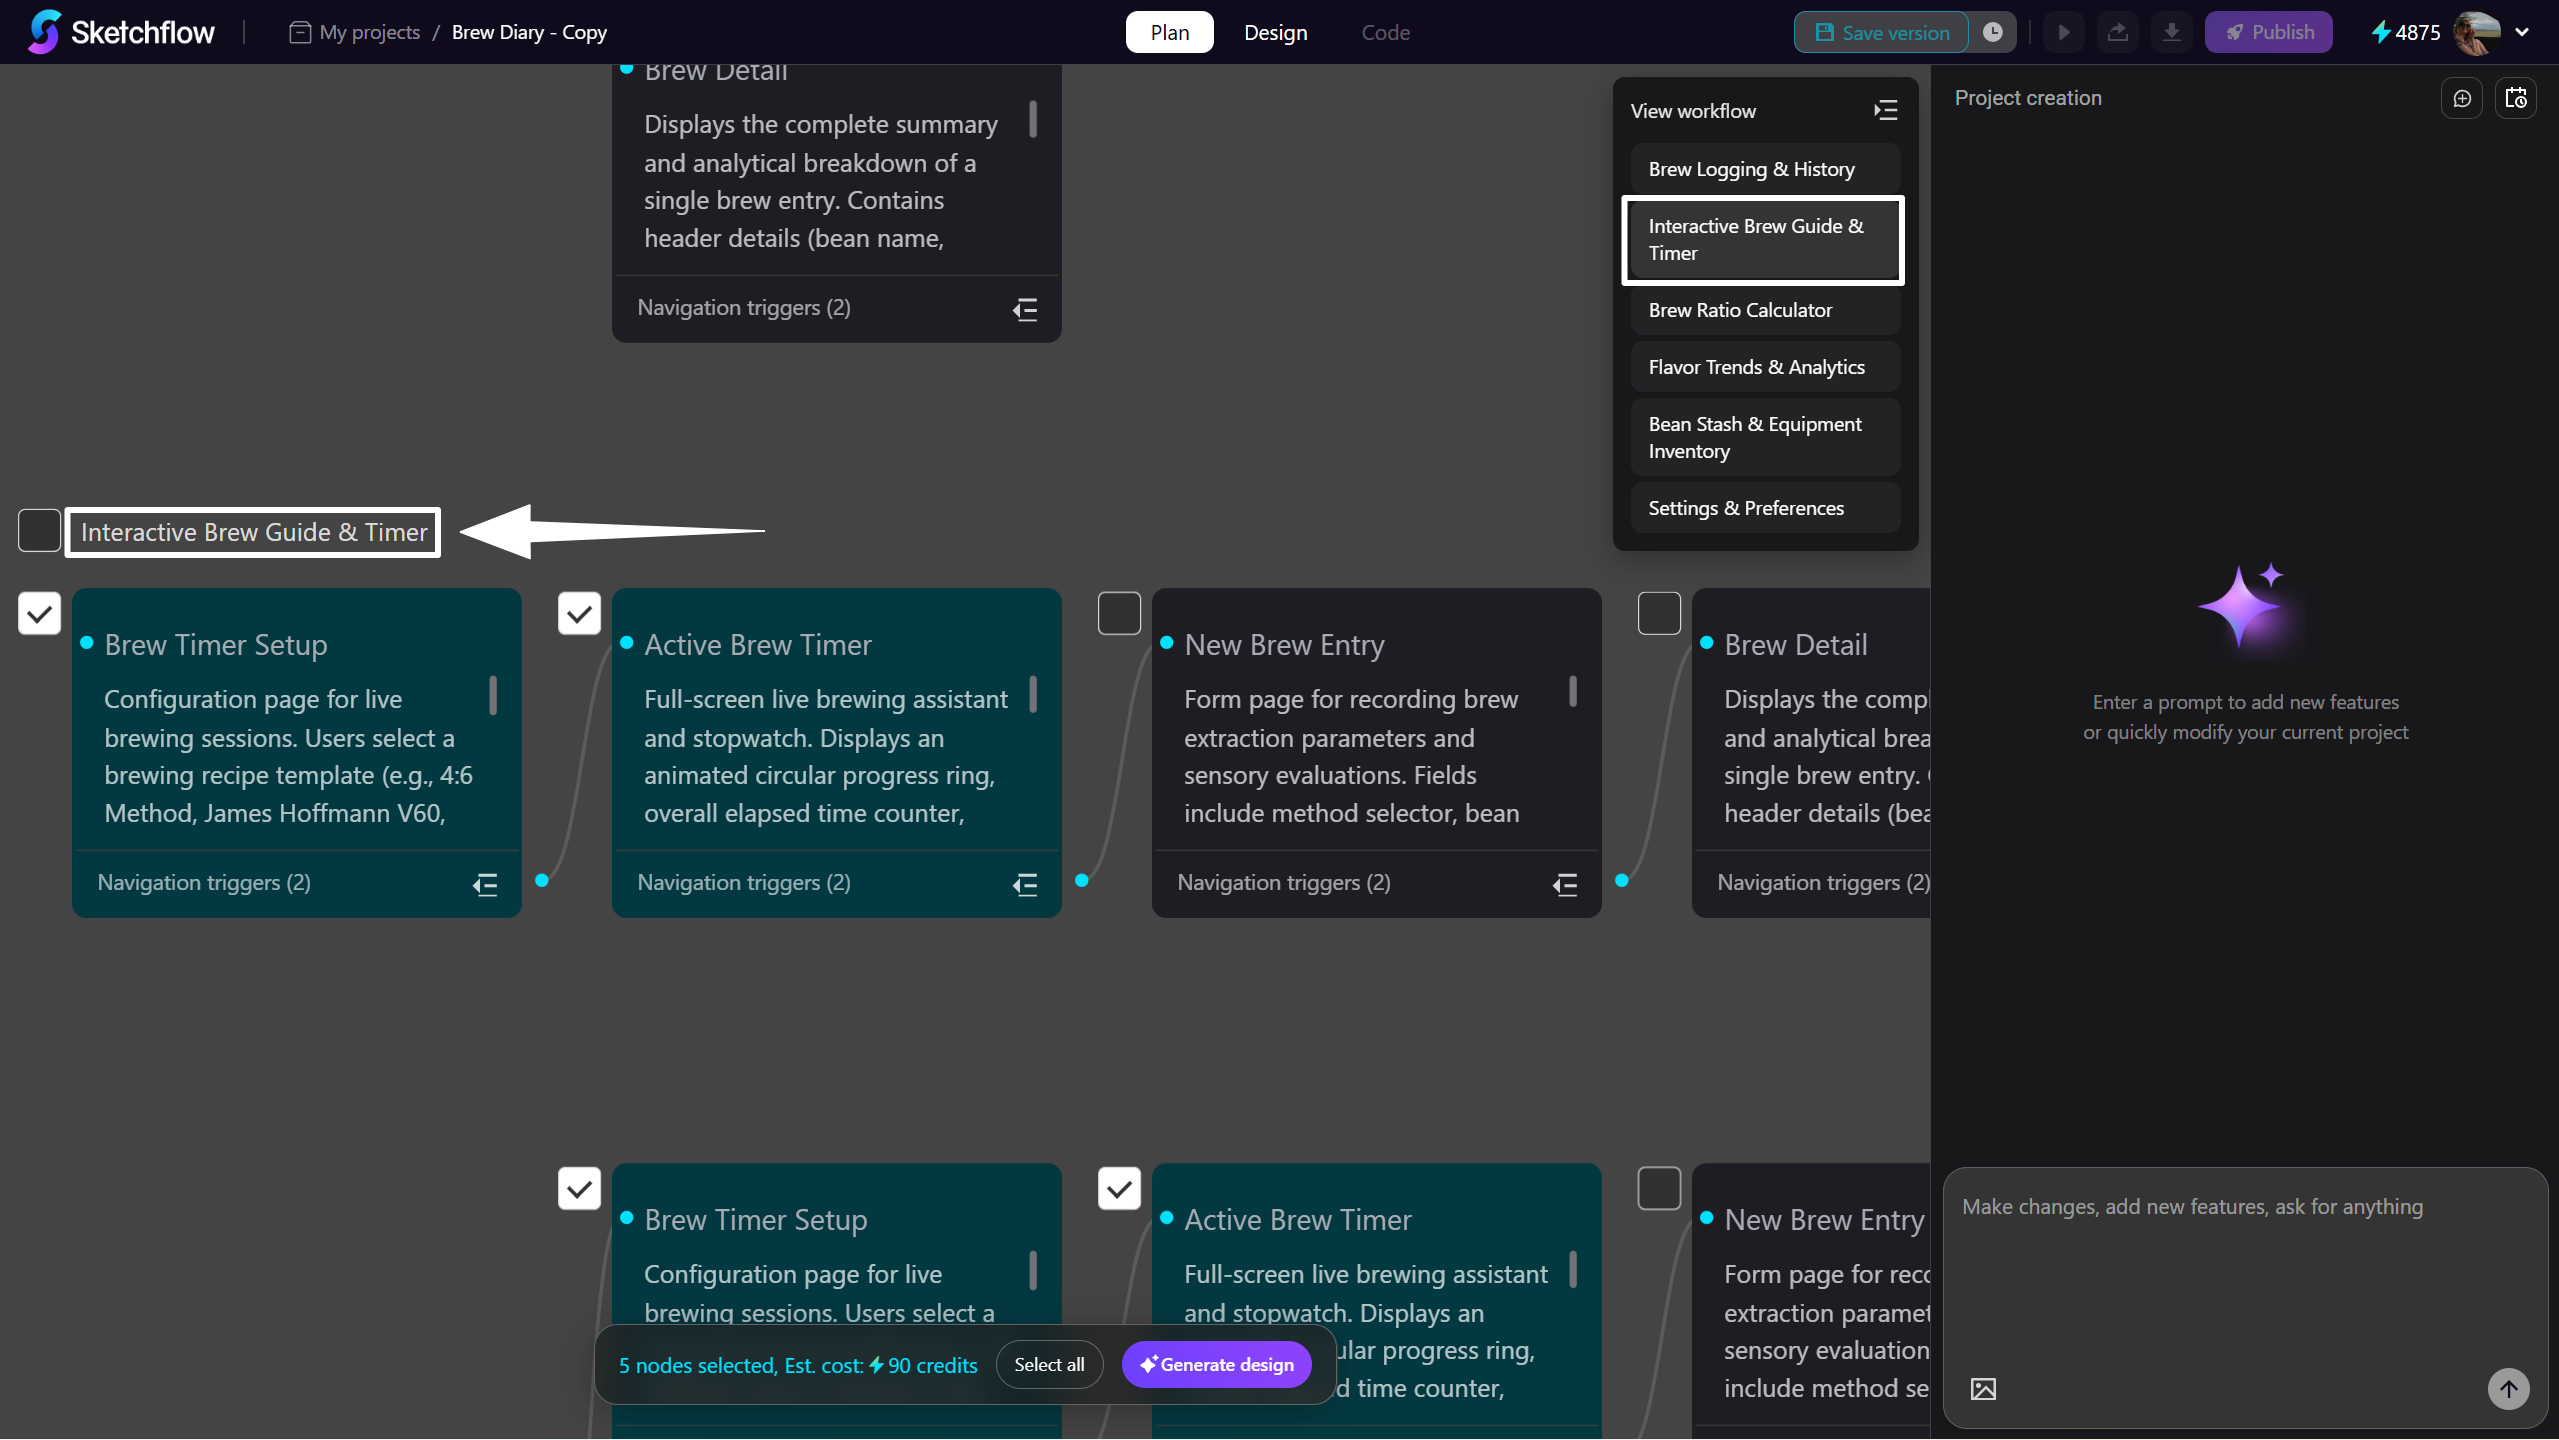
You can also drag to view the different user flows as you want in the left panel.
Navigation triggers
To view the navigation triggers associated with each page, click [Navigation triggers] to expand the related navigation paths. This lets you explore each navigation action and see where it leads. Identity each navigation paths by direct editing.
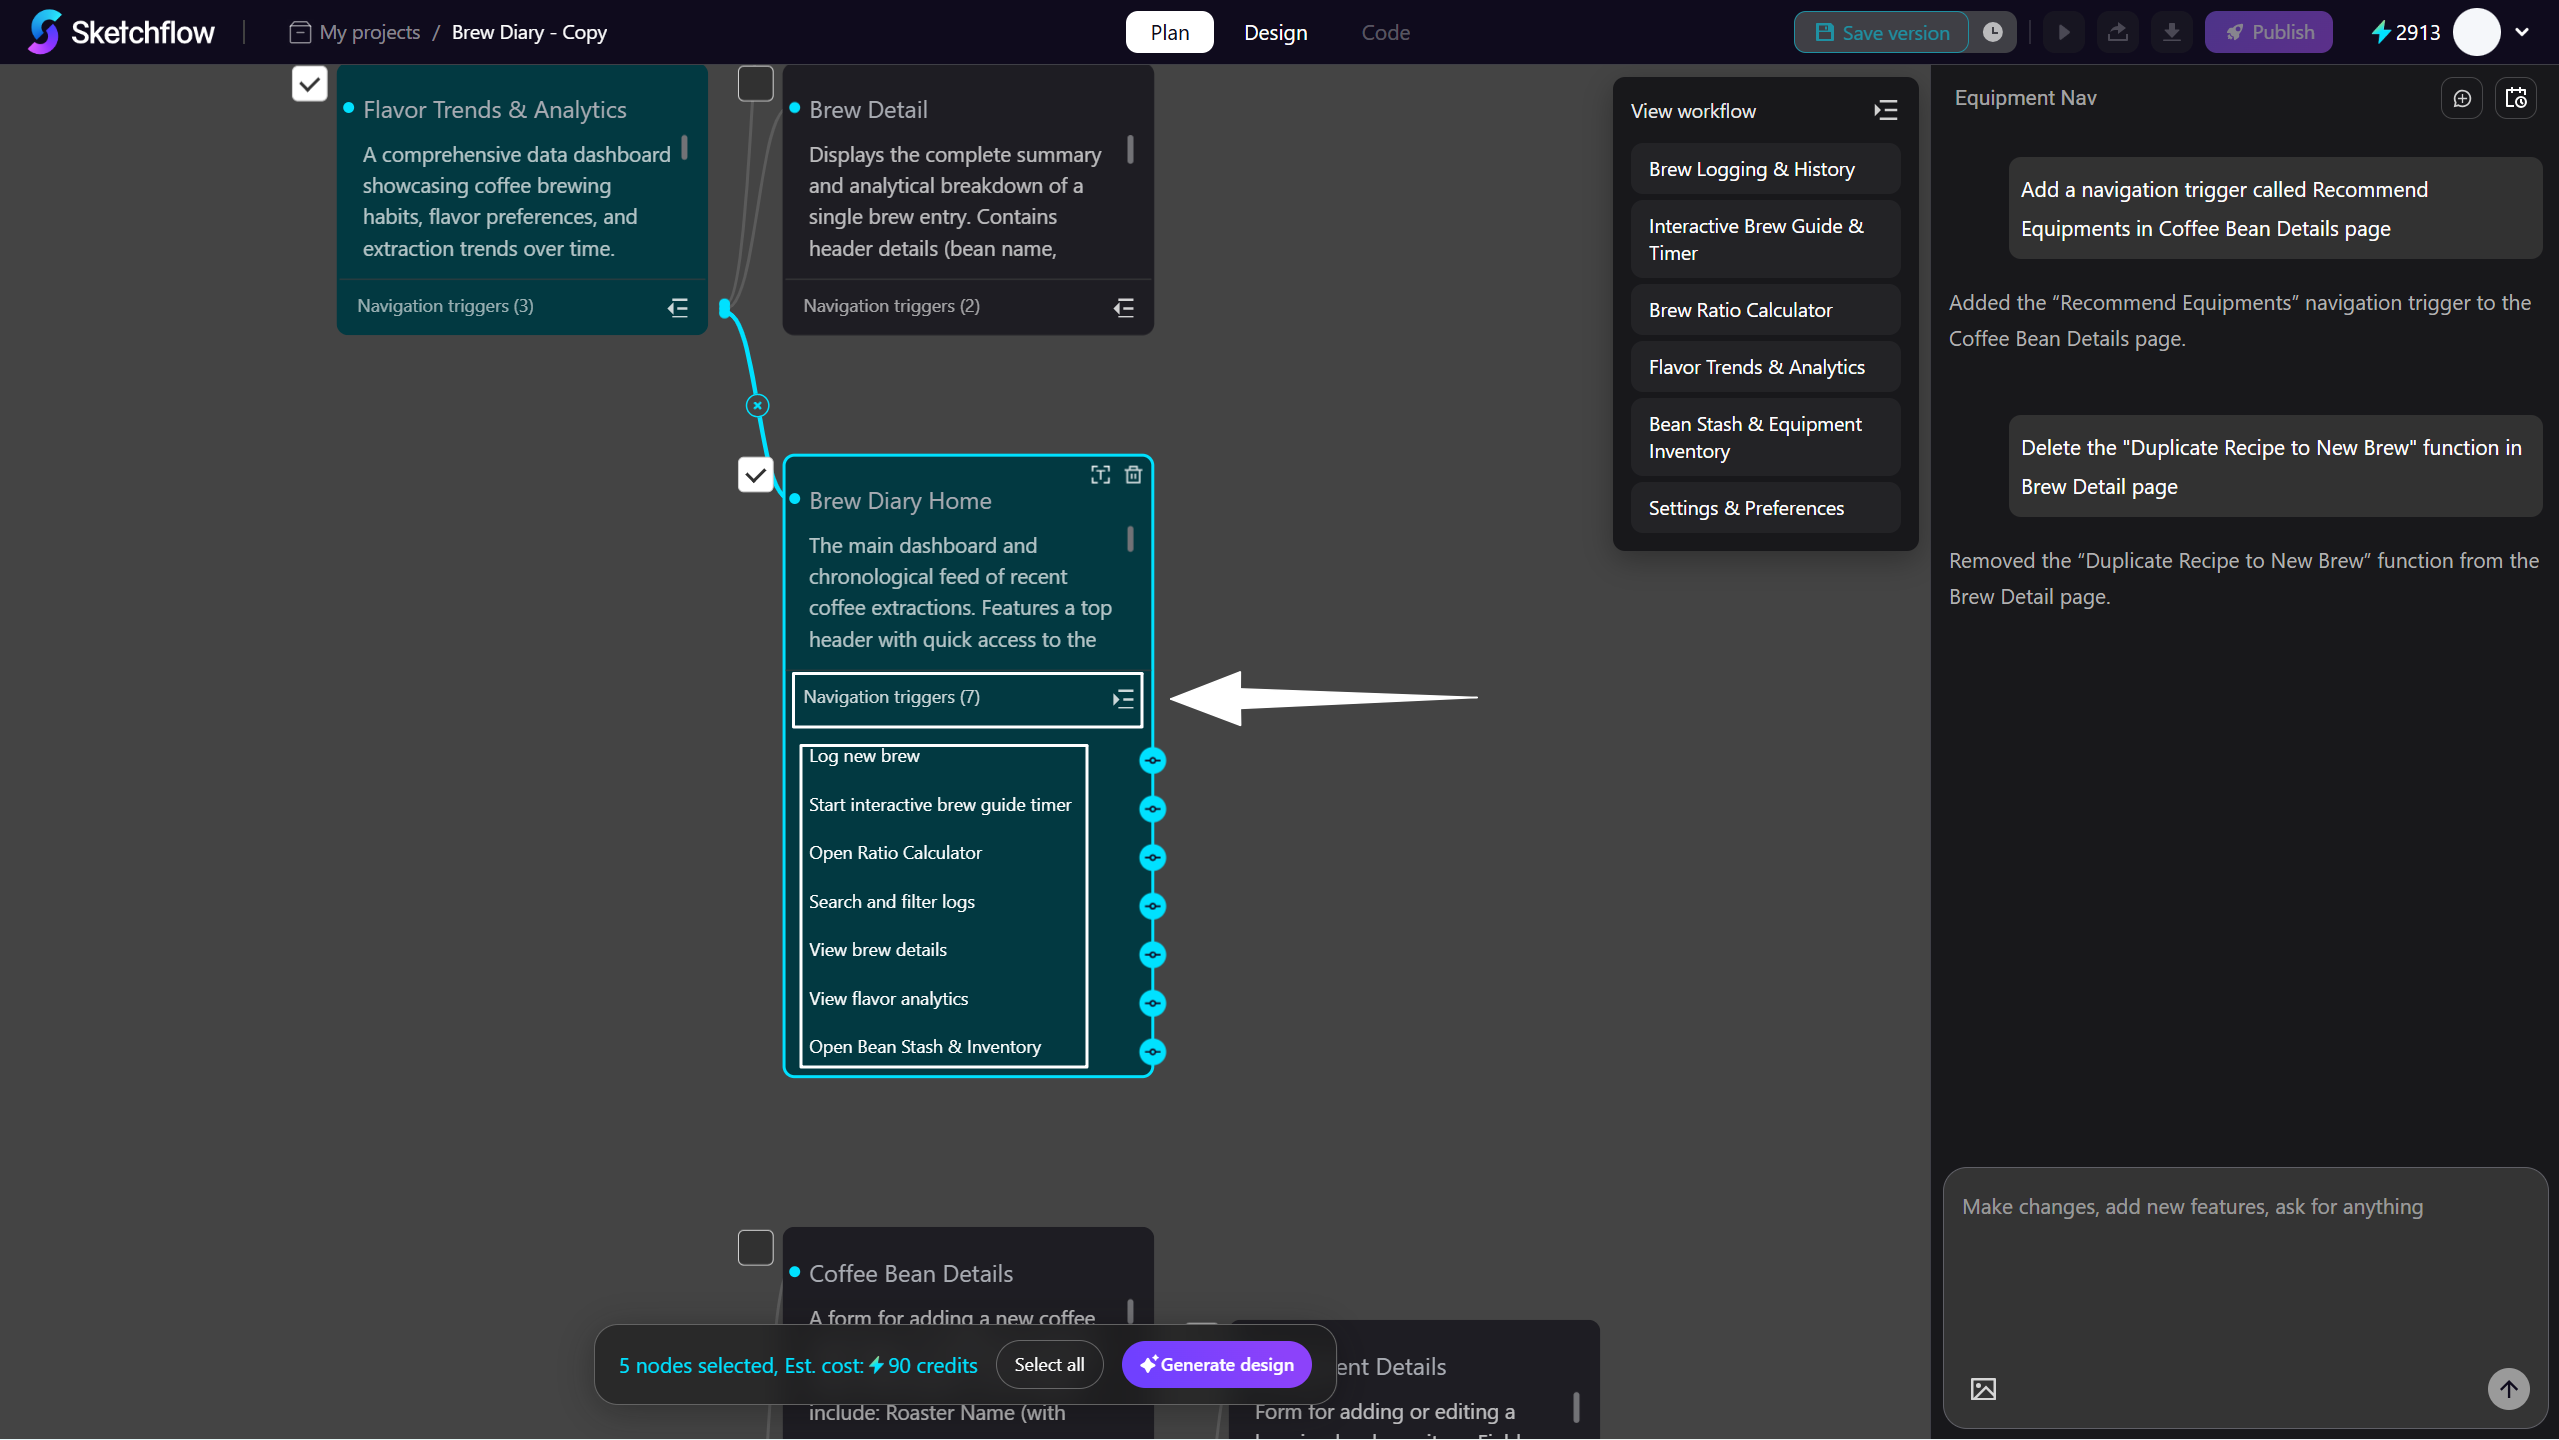
When Sketchflow generates the entire diagram for you, the core user flows will be identified and automatically generated first.
Want to build the core pages or see how it looks? You can directly click the [Generate design] button to view and customize.
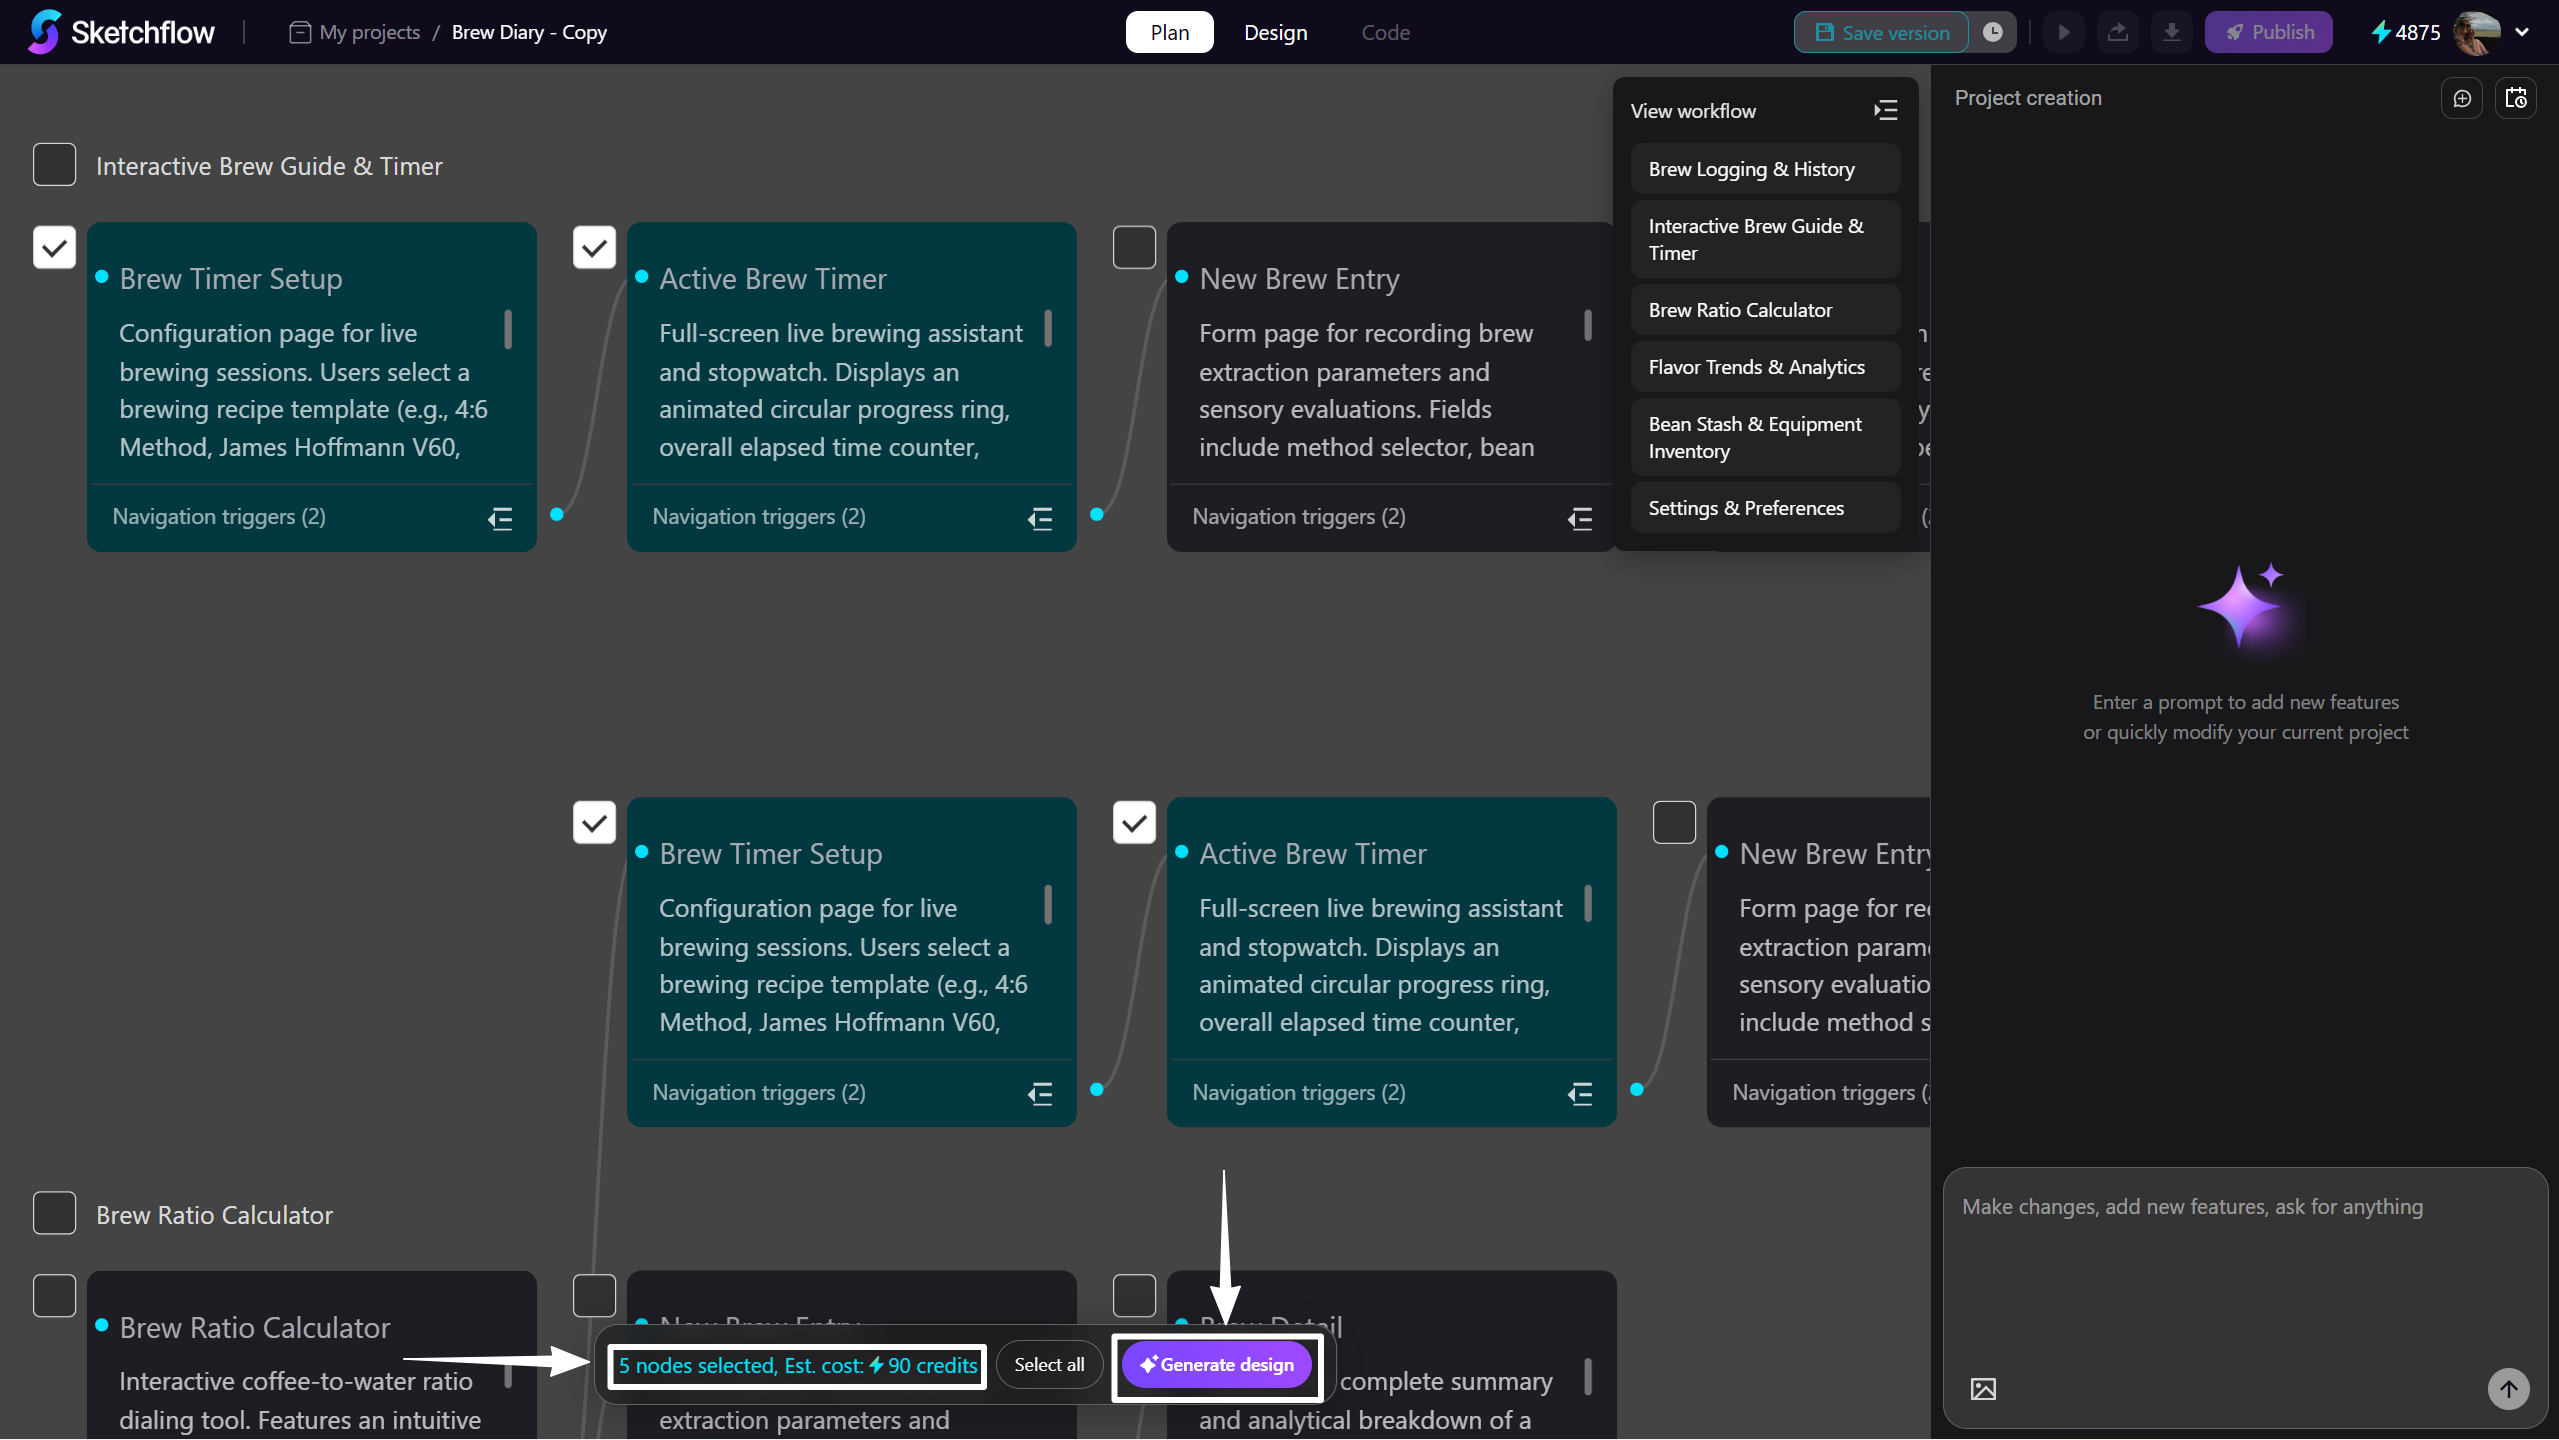
Manually Generate Additional User flows
If you'd like to generate additional user flows, simply select the ones you need and click [Generate] to generate the corresponding nodes.
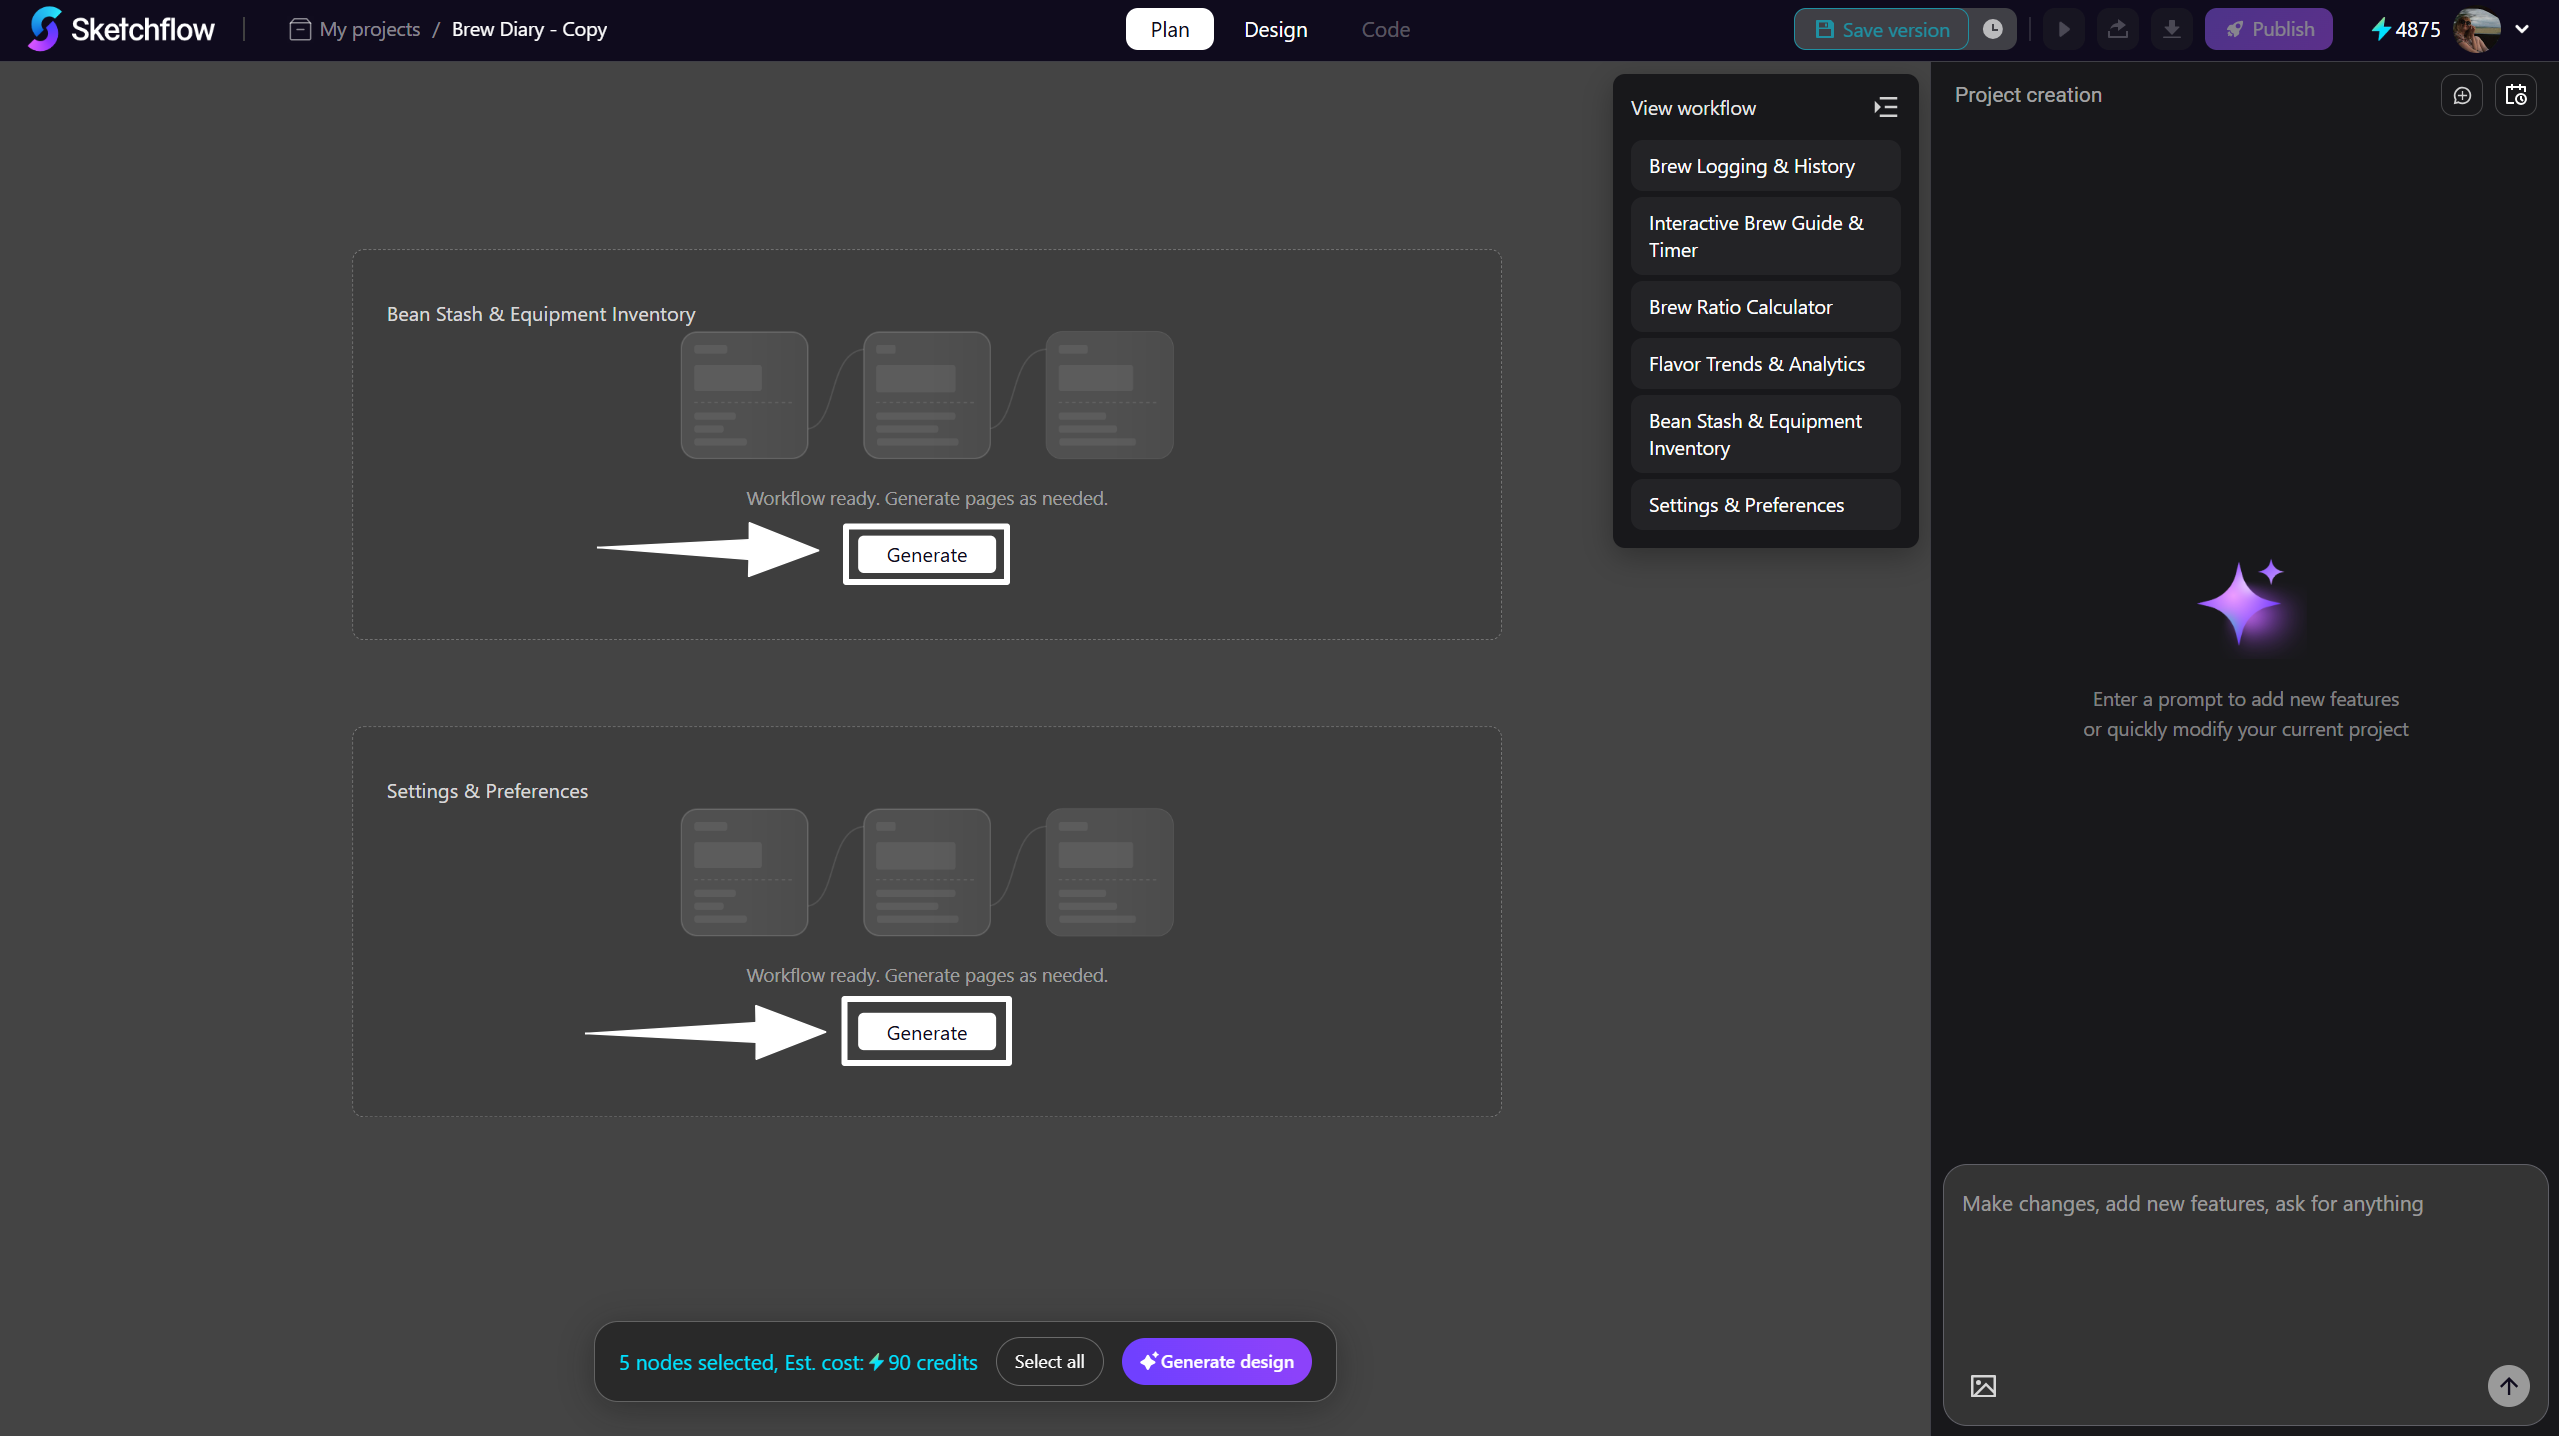
If you want to adjust the user flows, nodes or page content depending on your needs, you can make edits to it (see in the following tutorial).
2. Edit User Flows Connections
Multi-Node Selection and Group Editing
Hold down the Shift key and drag your mouse to select multiple nodes at once. You can then move these pages together, connect them to existing pages.
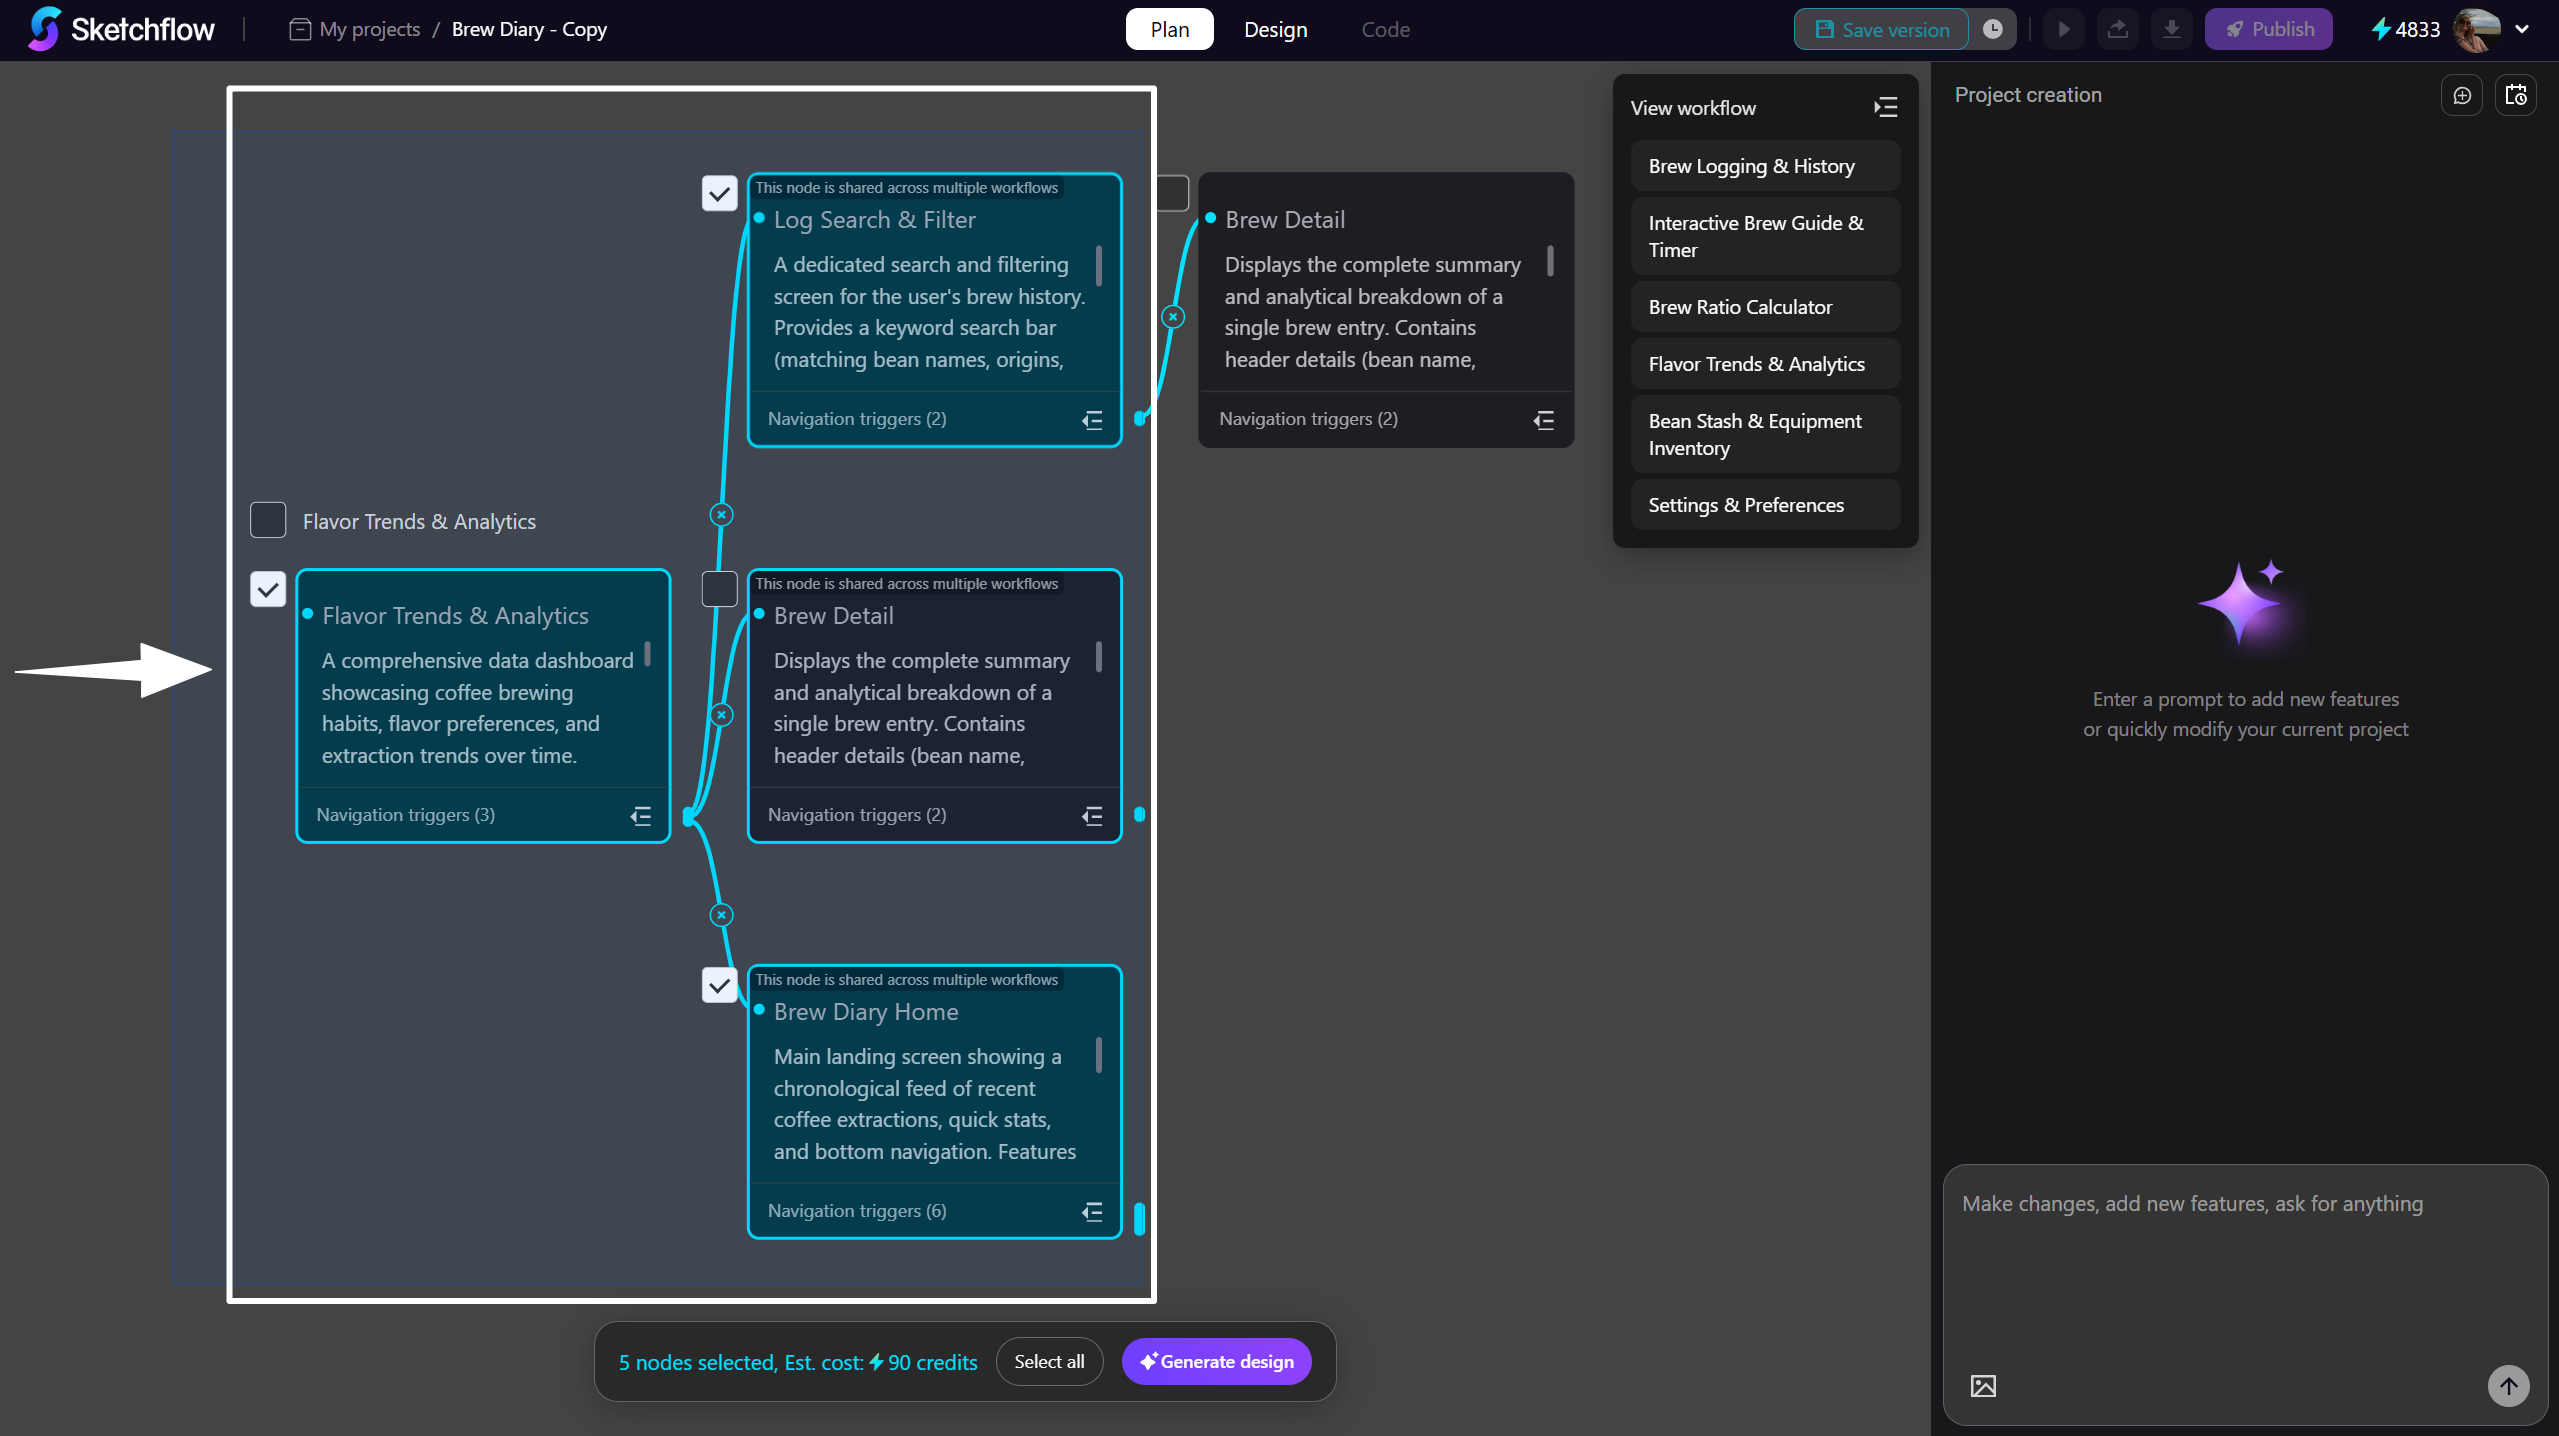
Edit Connections Between Pages
You can flexibly edit connections between pages. Pages support branching, so a page can link to multiple subsequent pages.
-
To remove a connection, click the 'Delete' button in the middle of the connecting line between two pages.
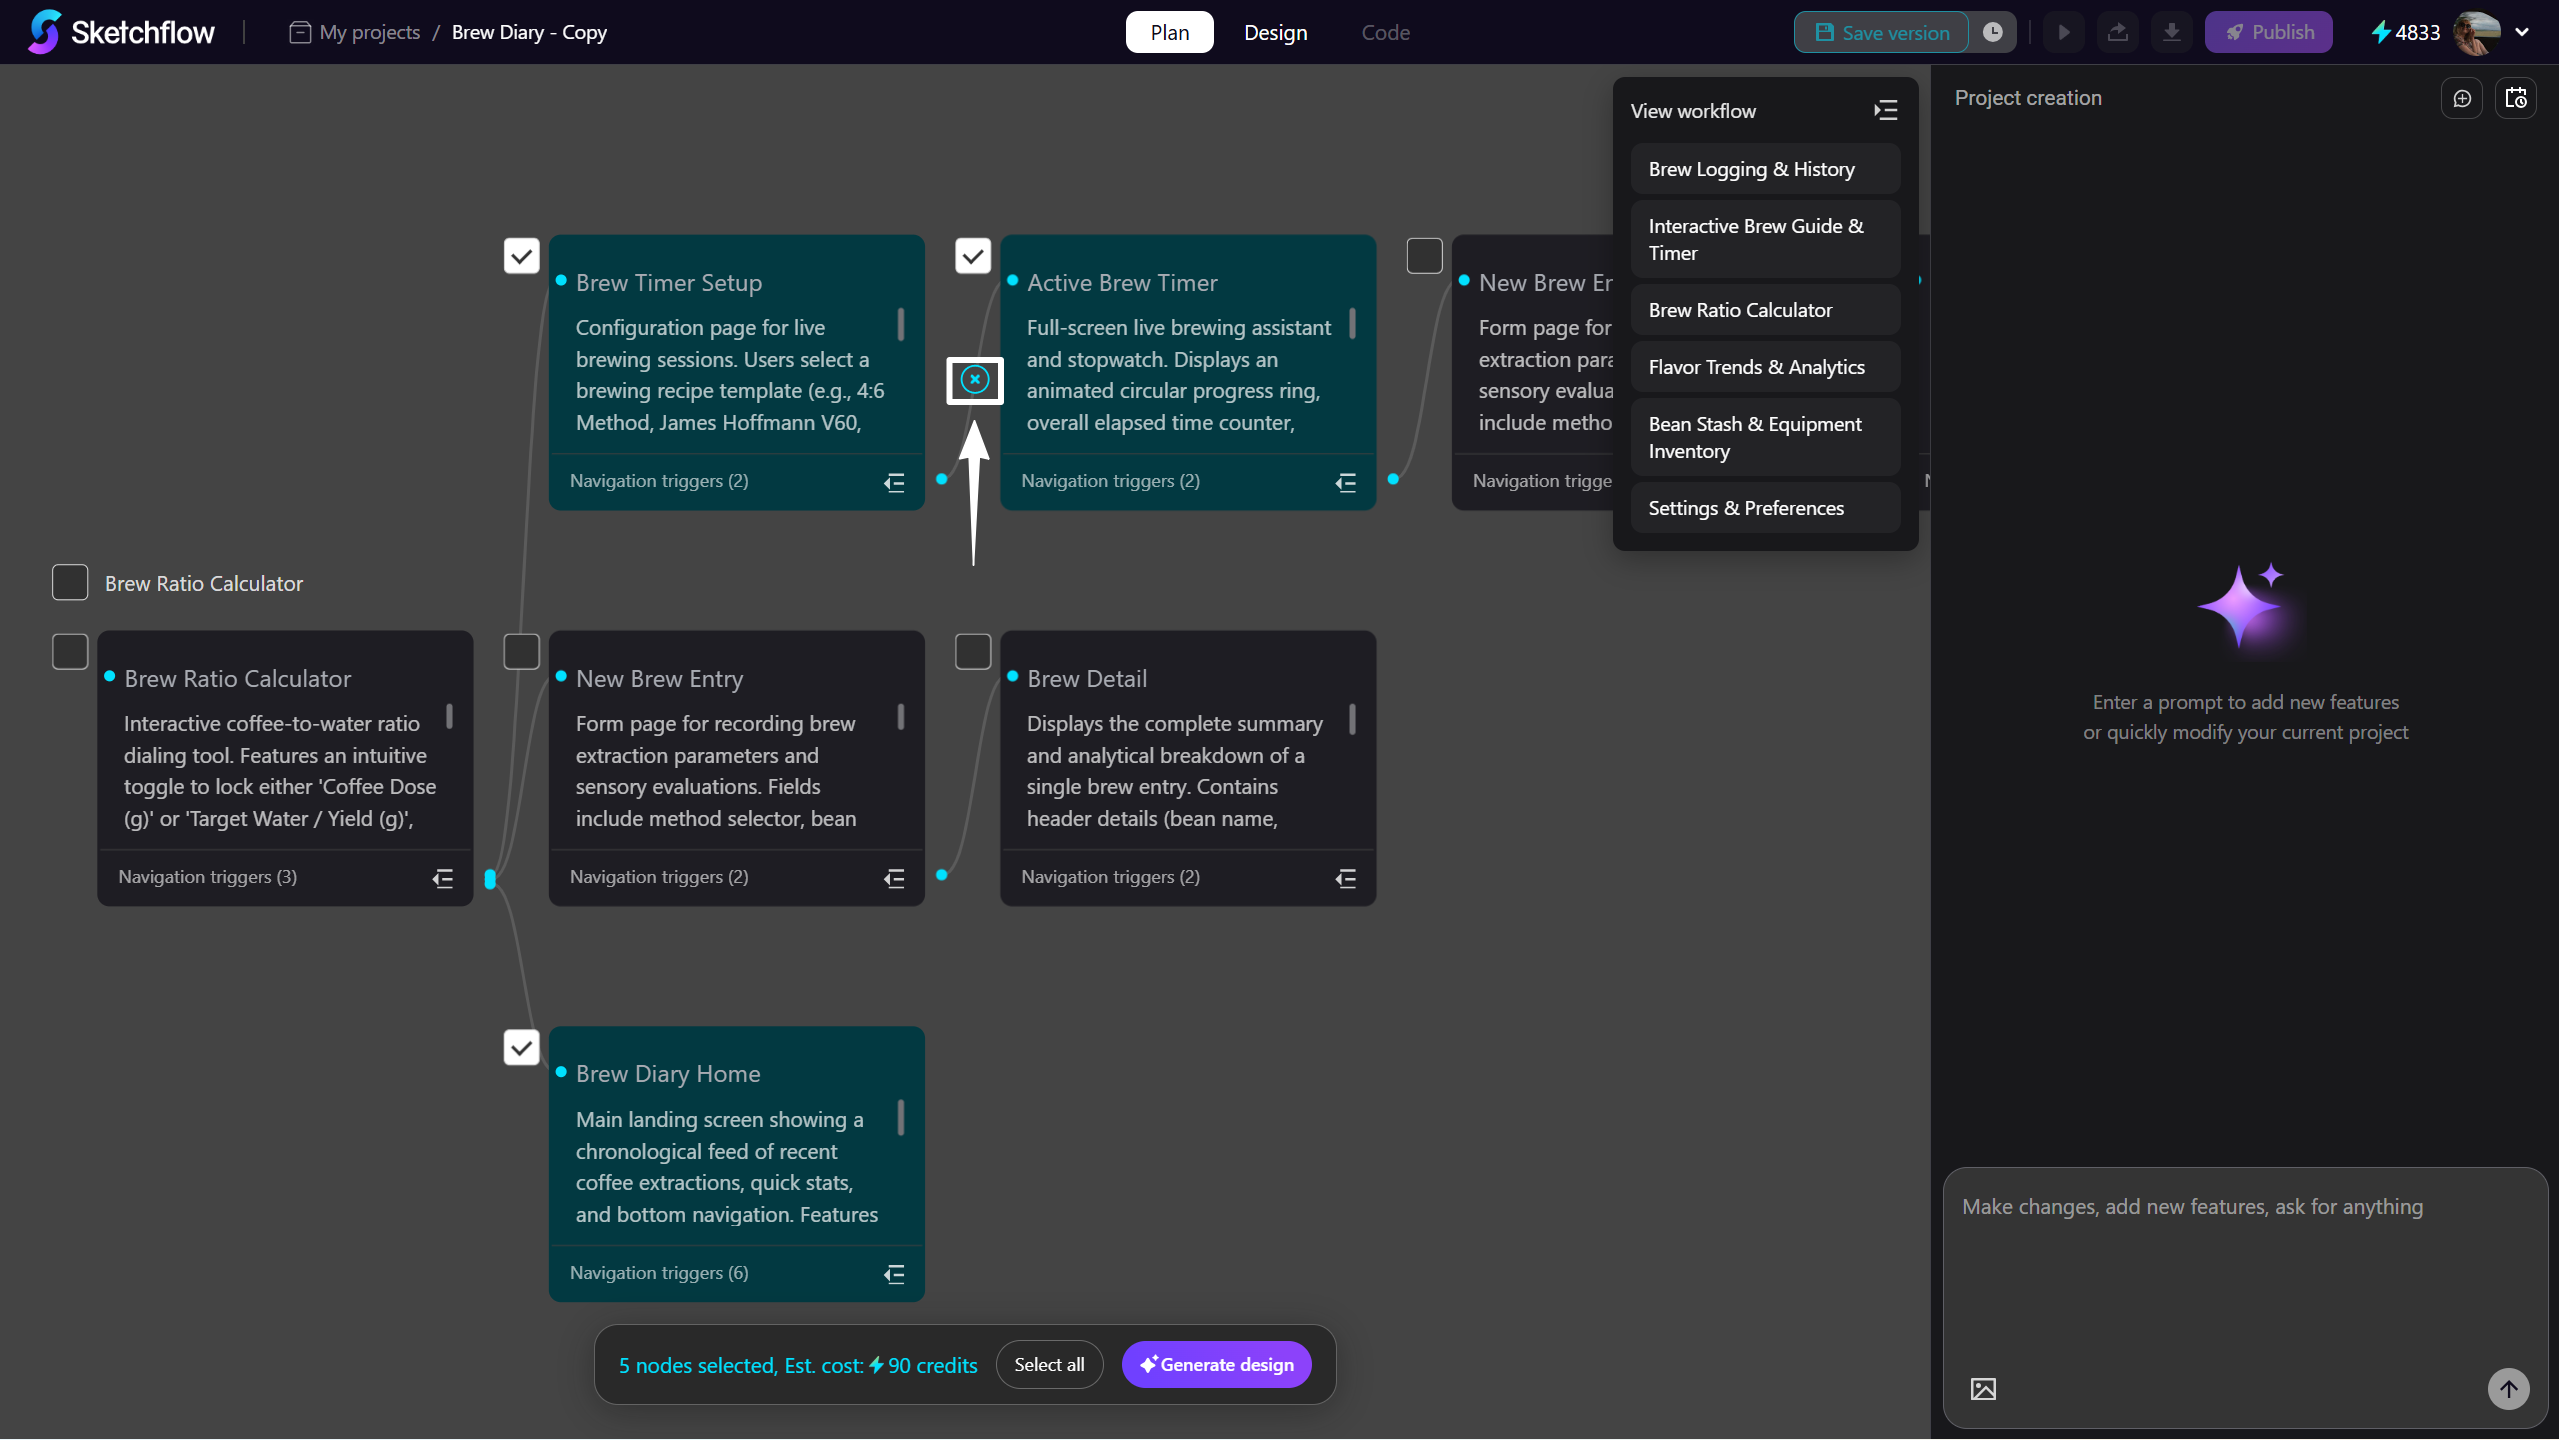
-
To link one page to another, select the source page, click the 'Link' button, and drag to the connection point on the target page to create a new link.
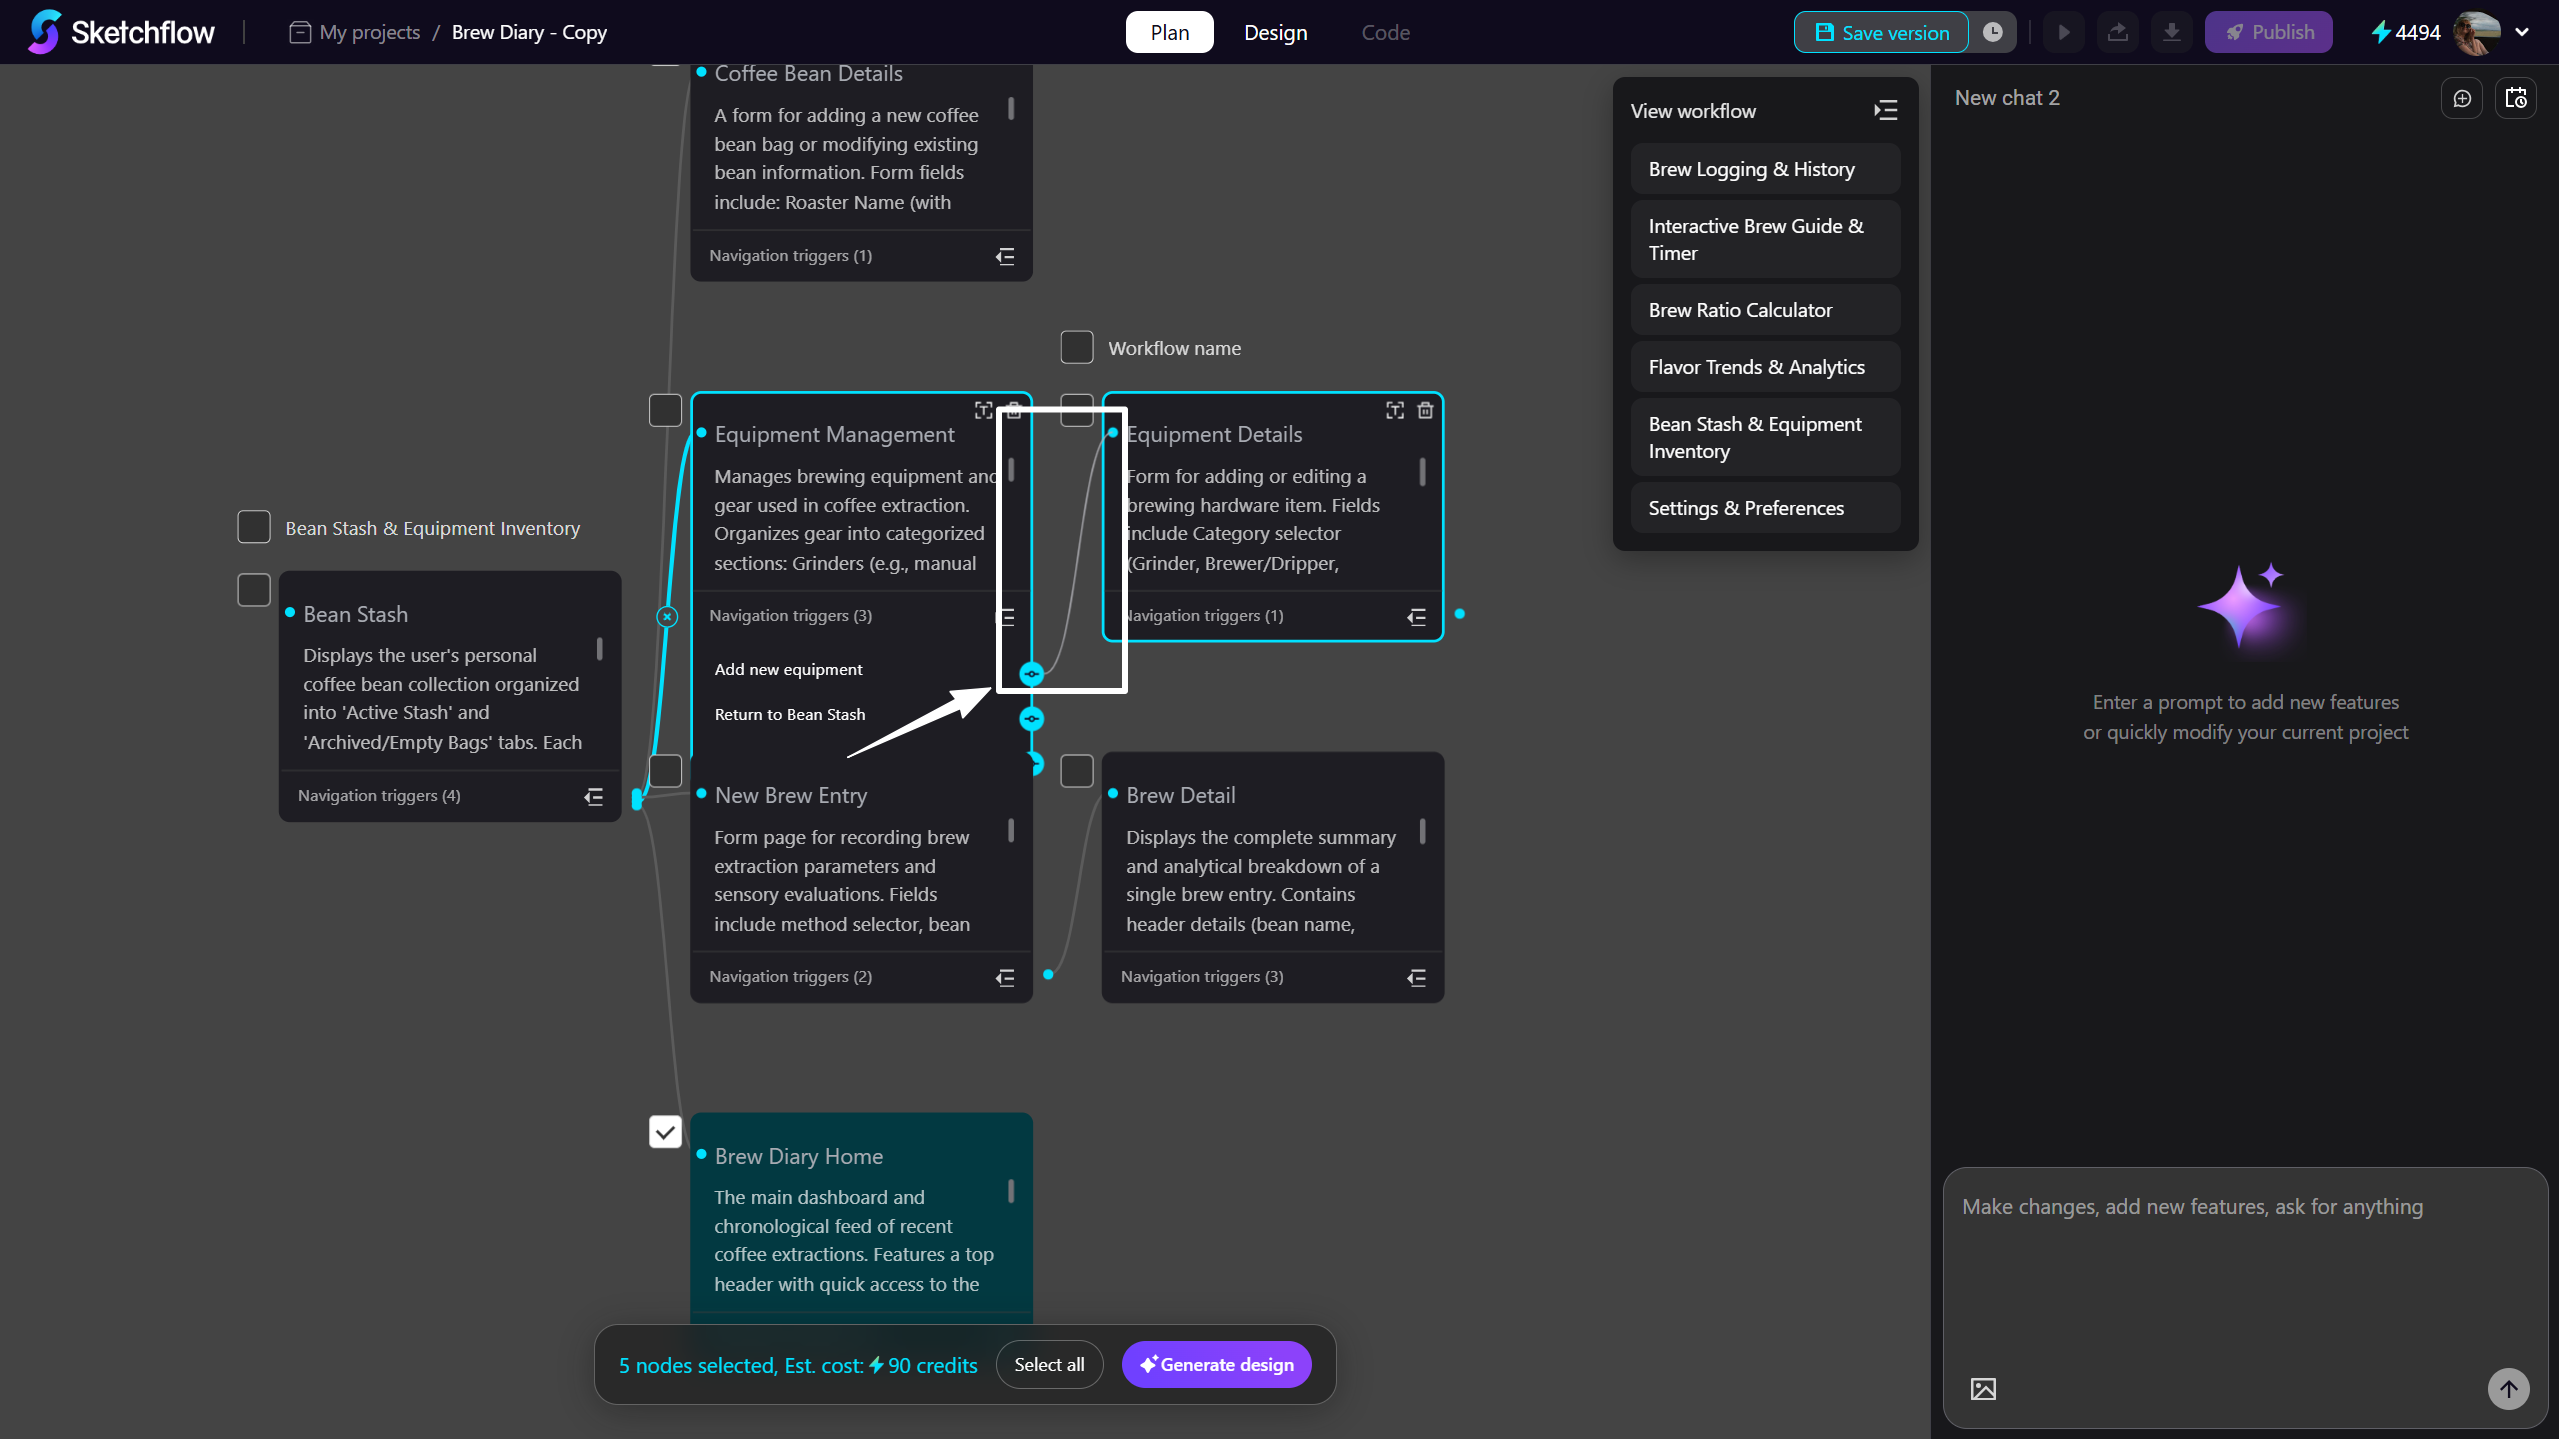
- If the linked page does not have enough navigation triggers, you can add the required function or action as needed.
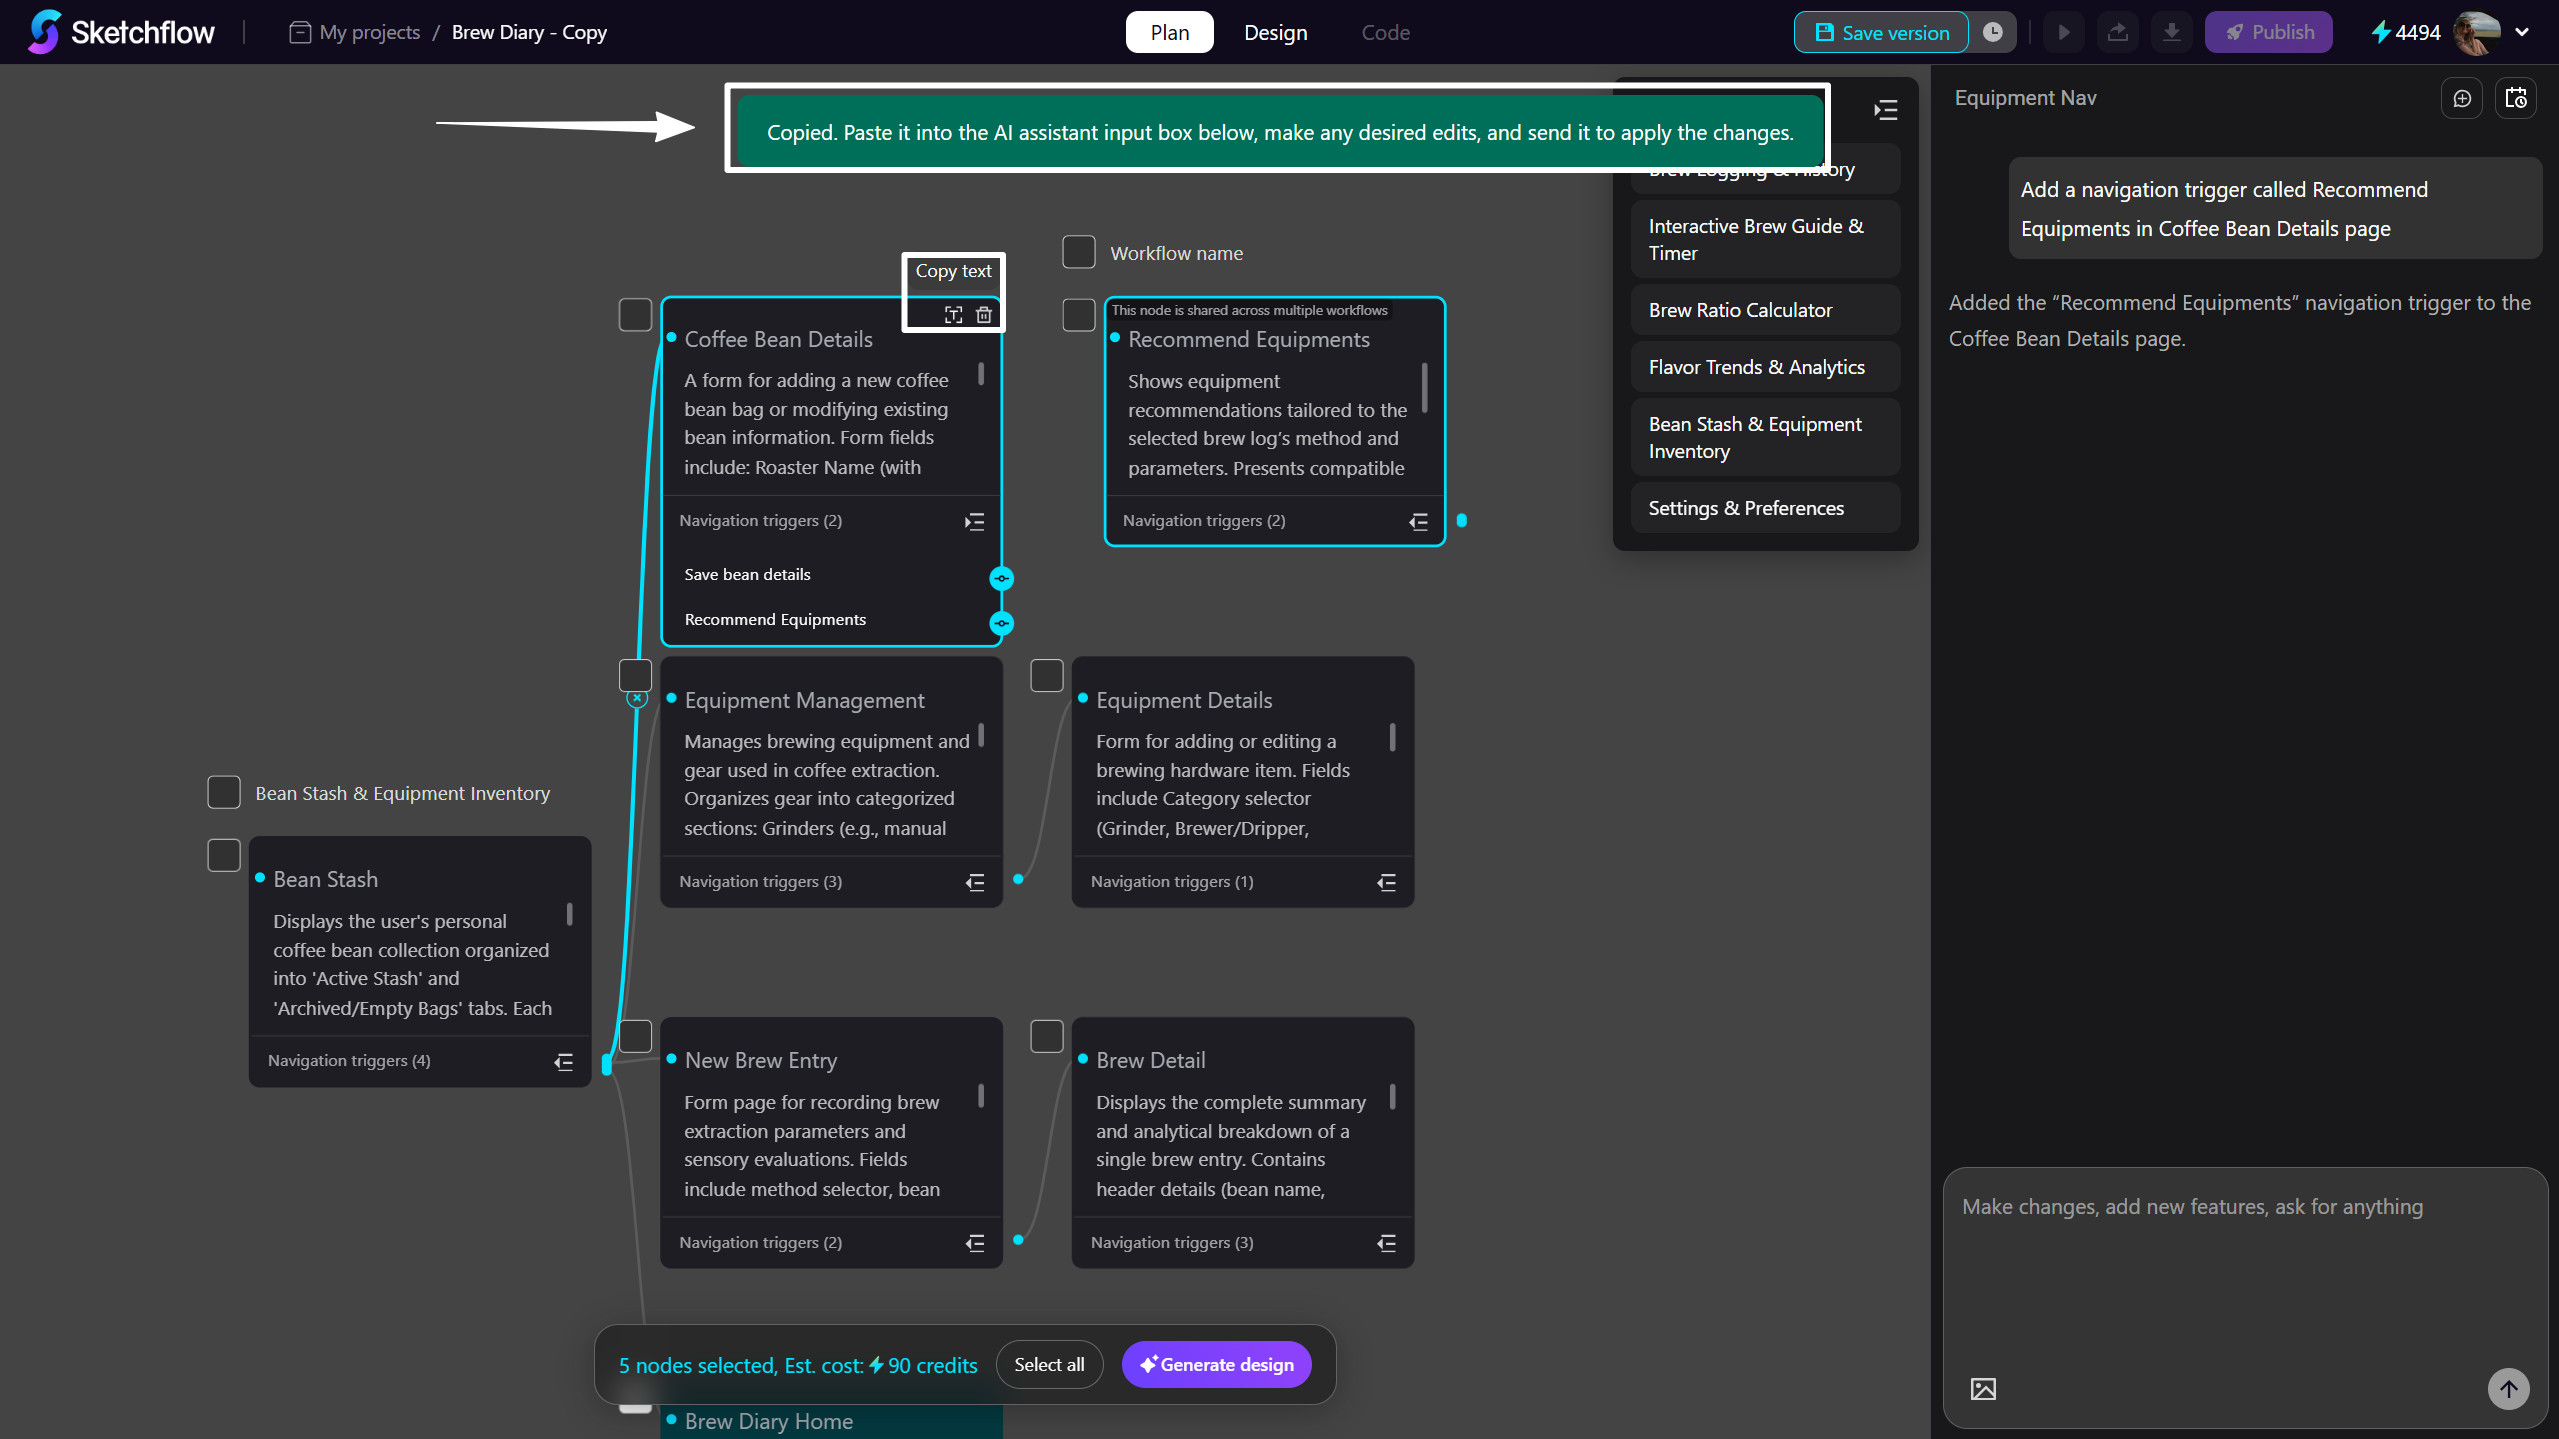
Two ways to add a new function to a page:
-
Ask AI Assistant to add a new function.
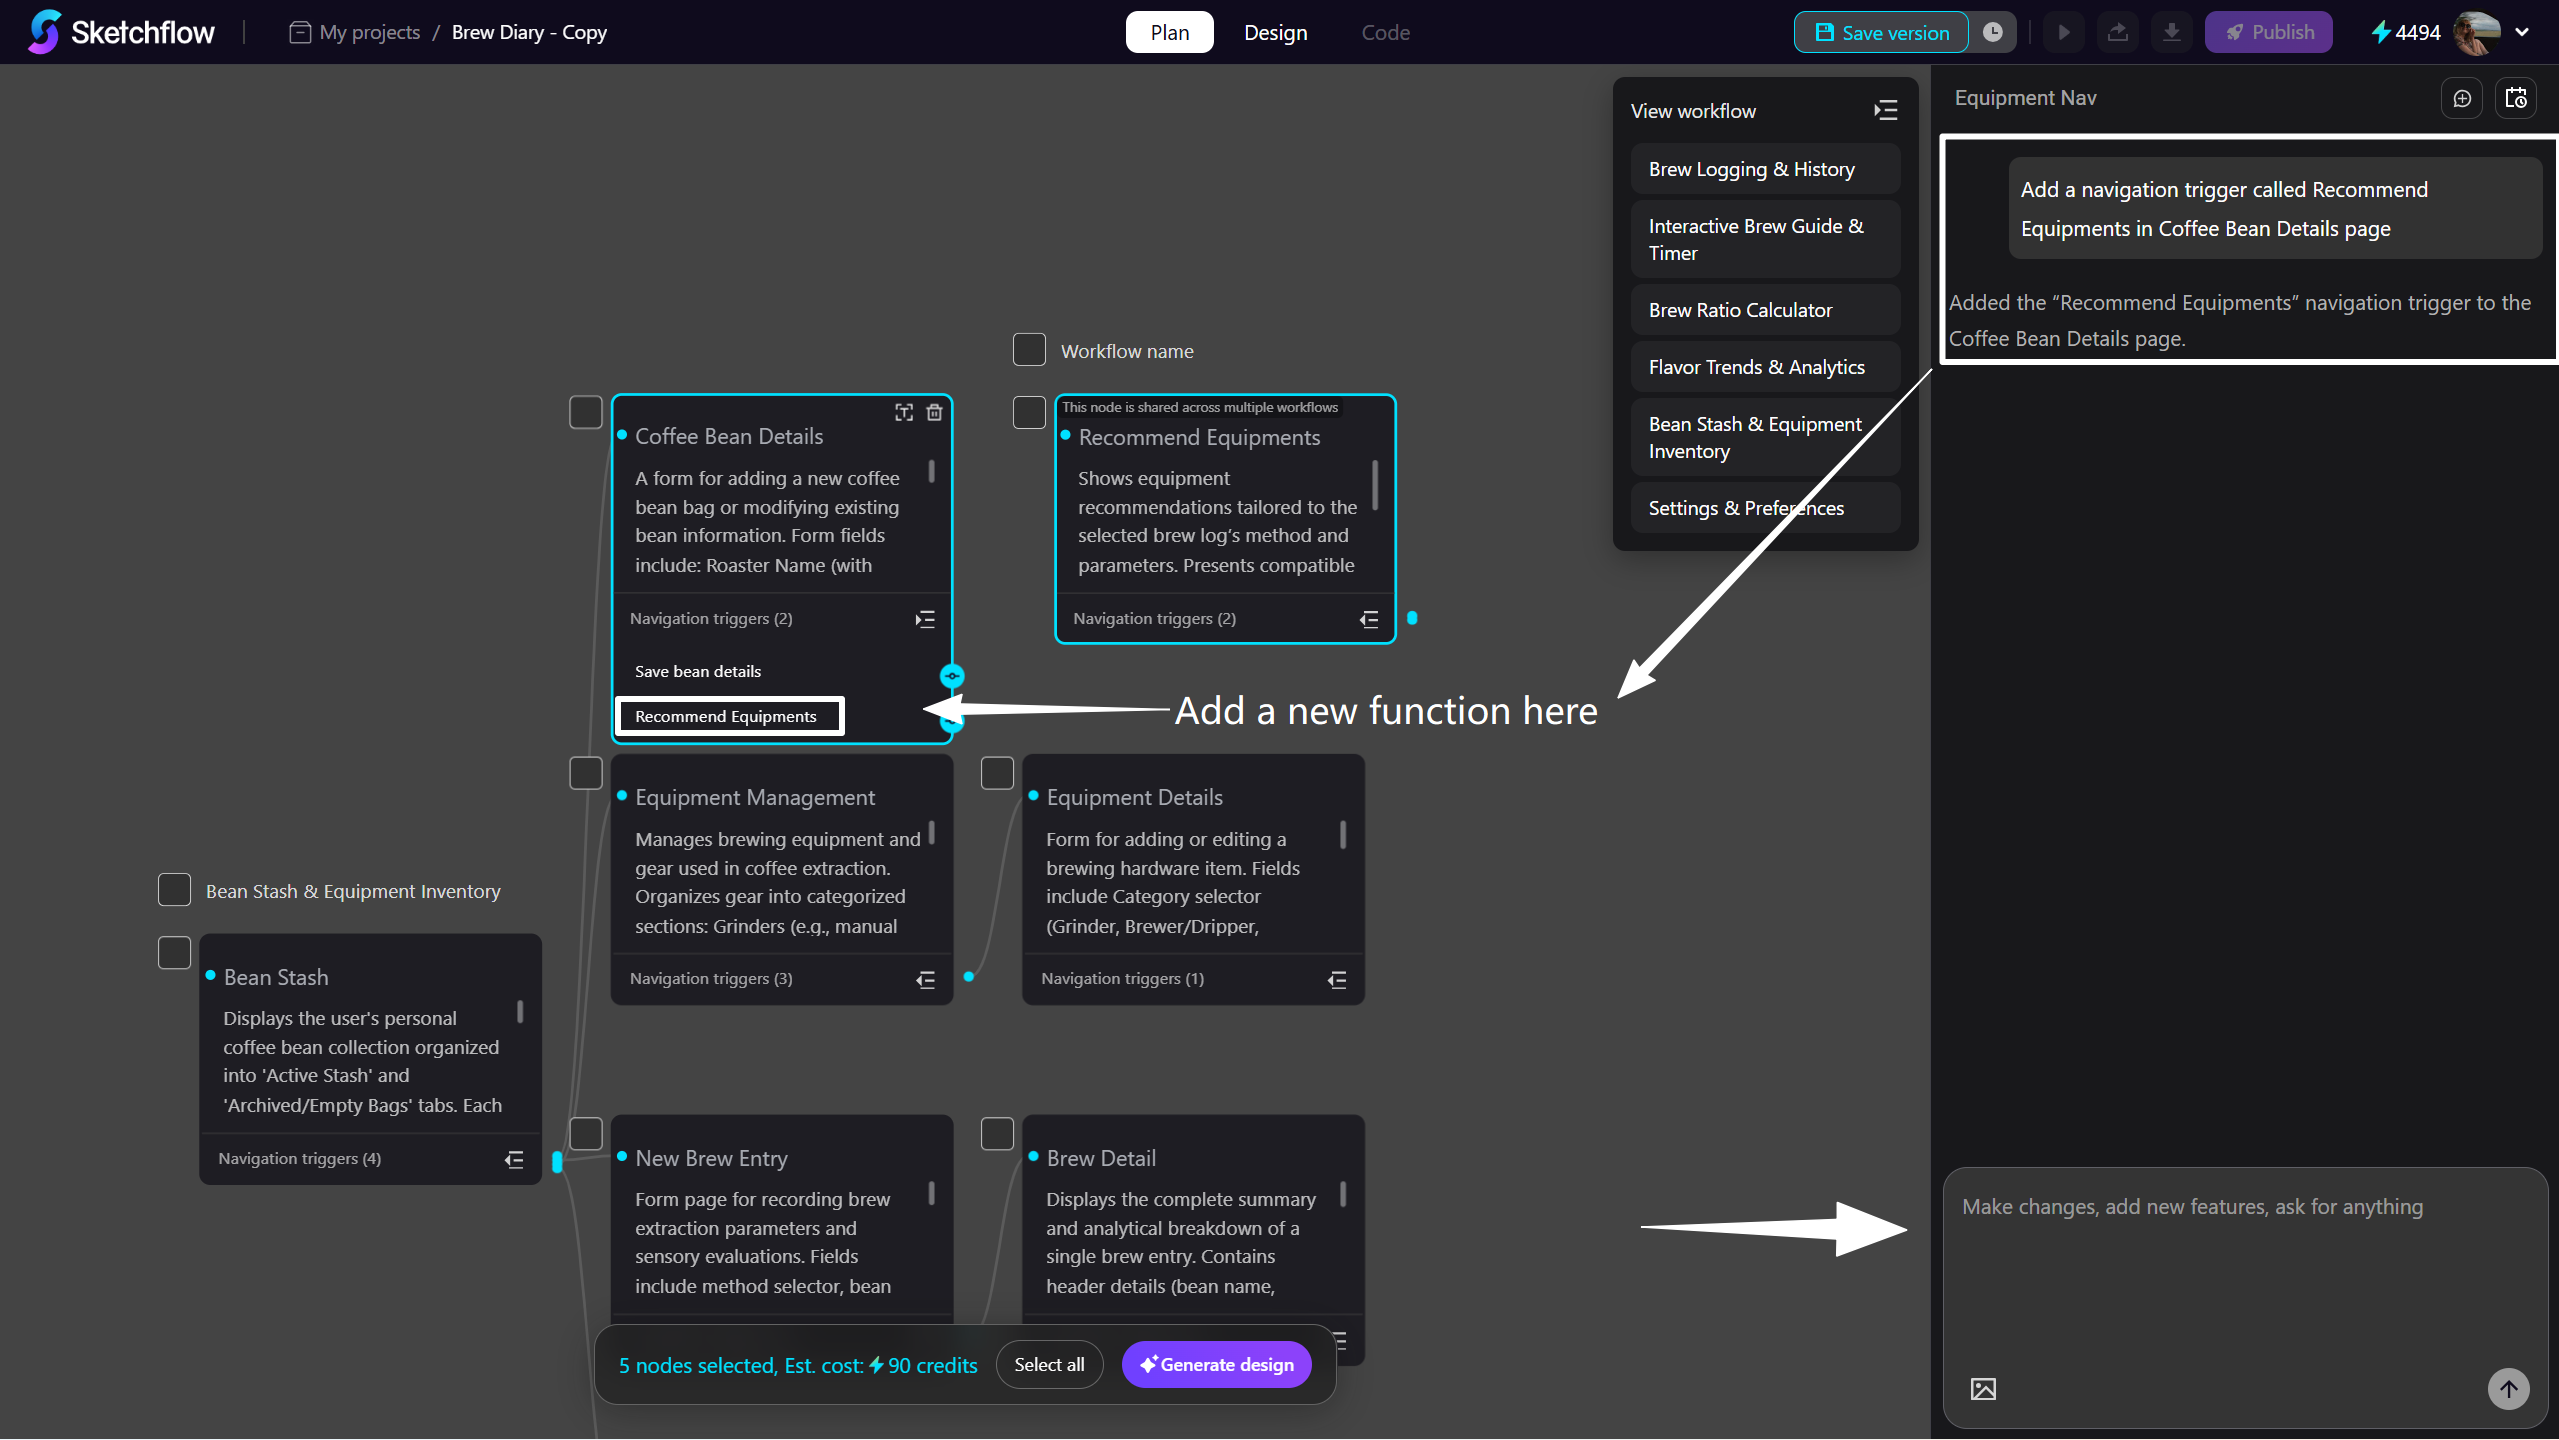
-
Copy the page text, add the function manually.
Tips
-
All pages can be dragged and rearranged freely.
-
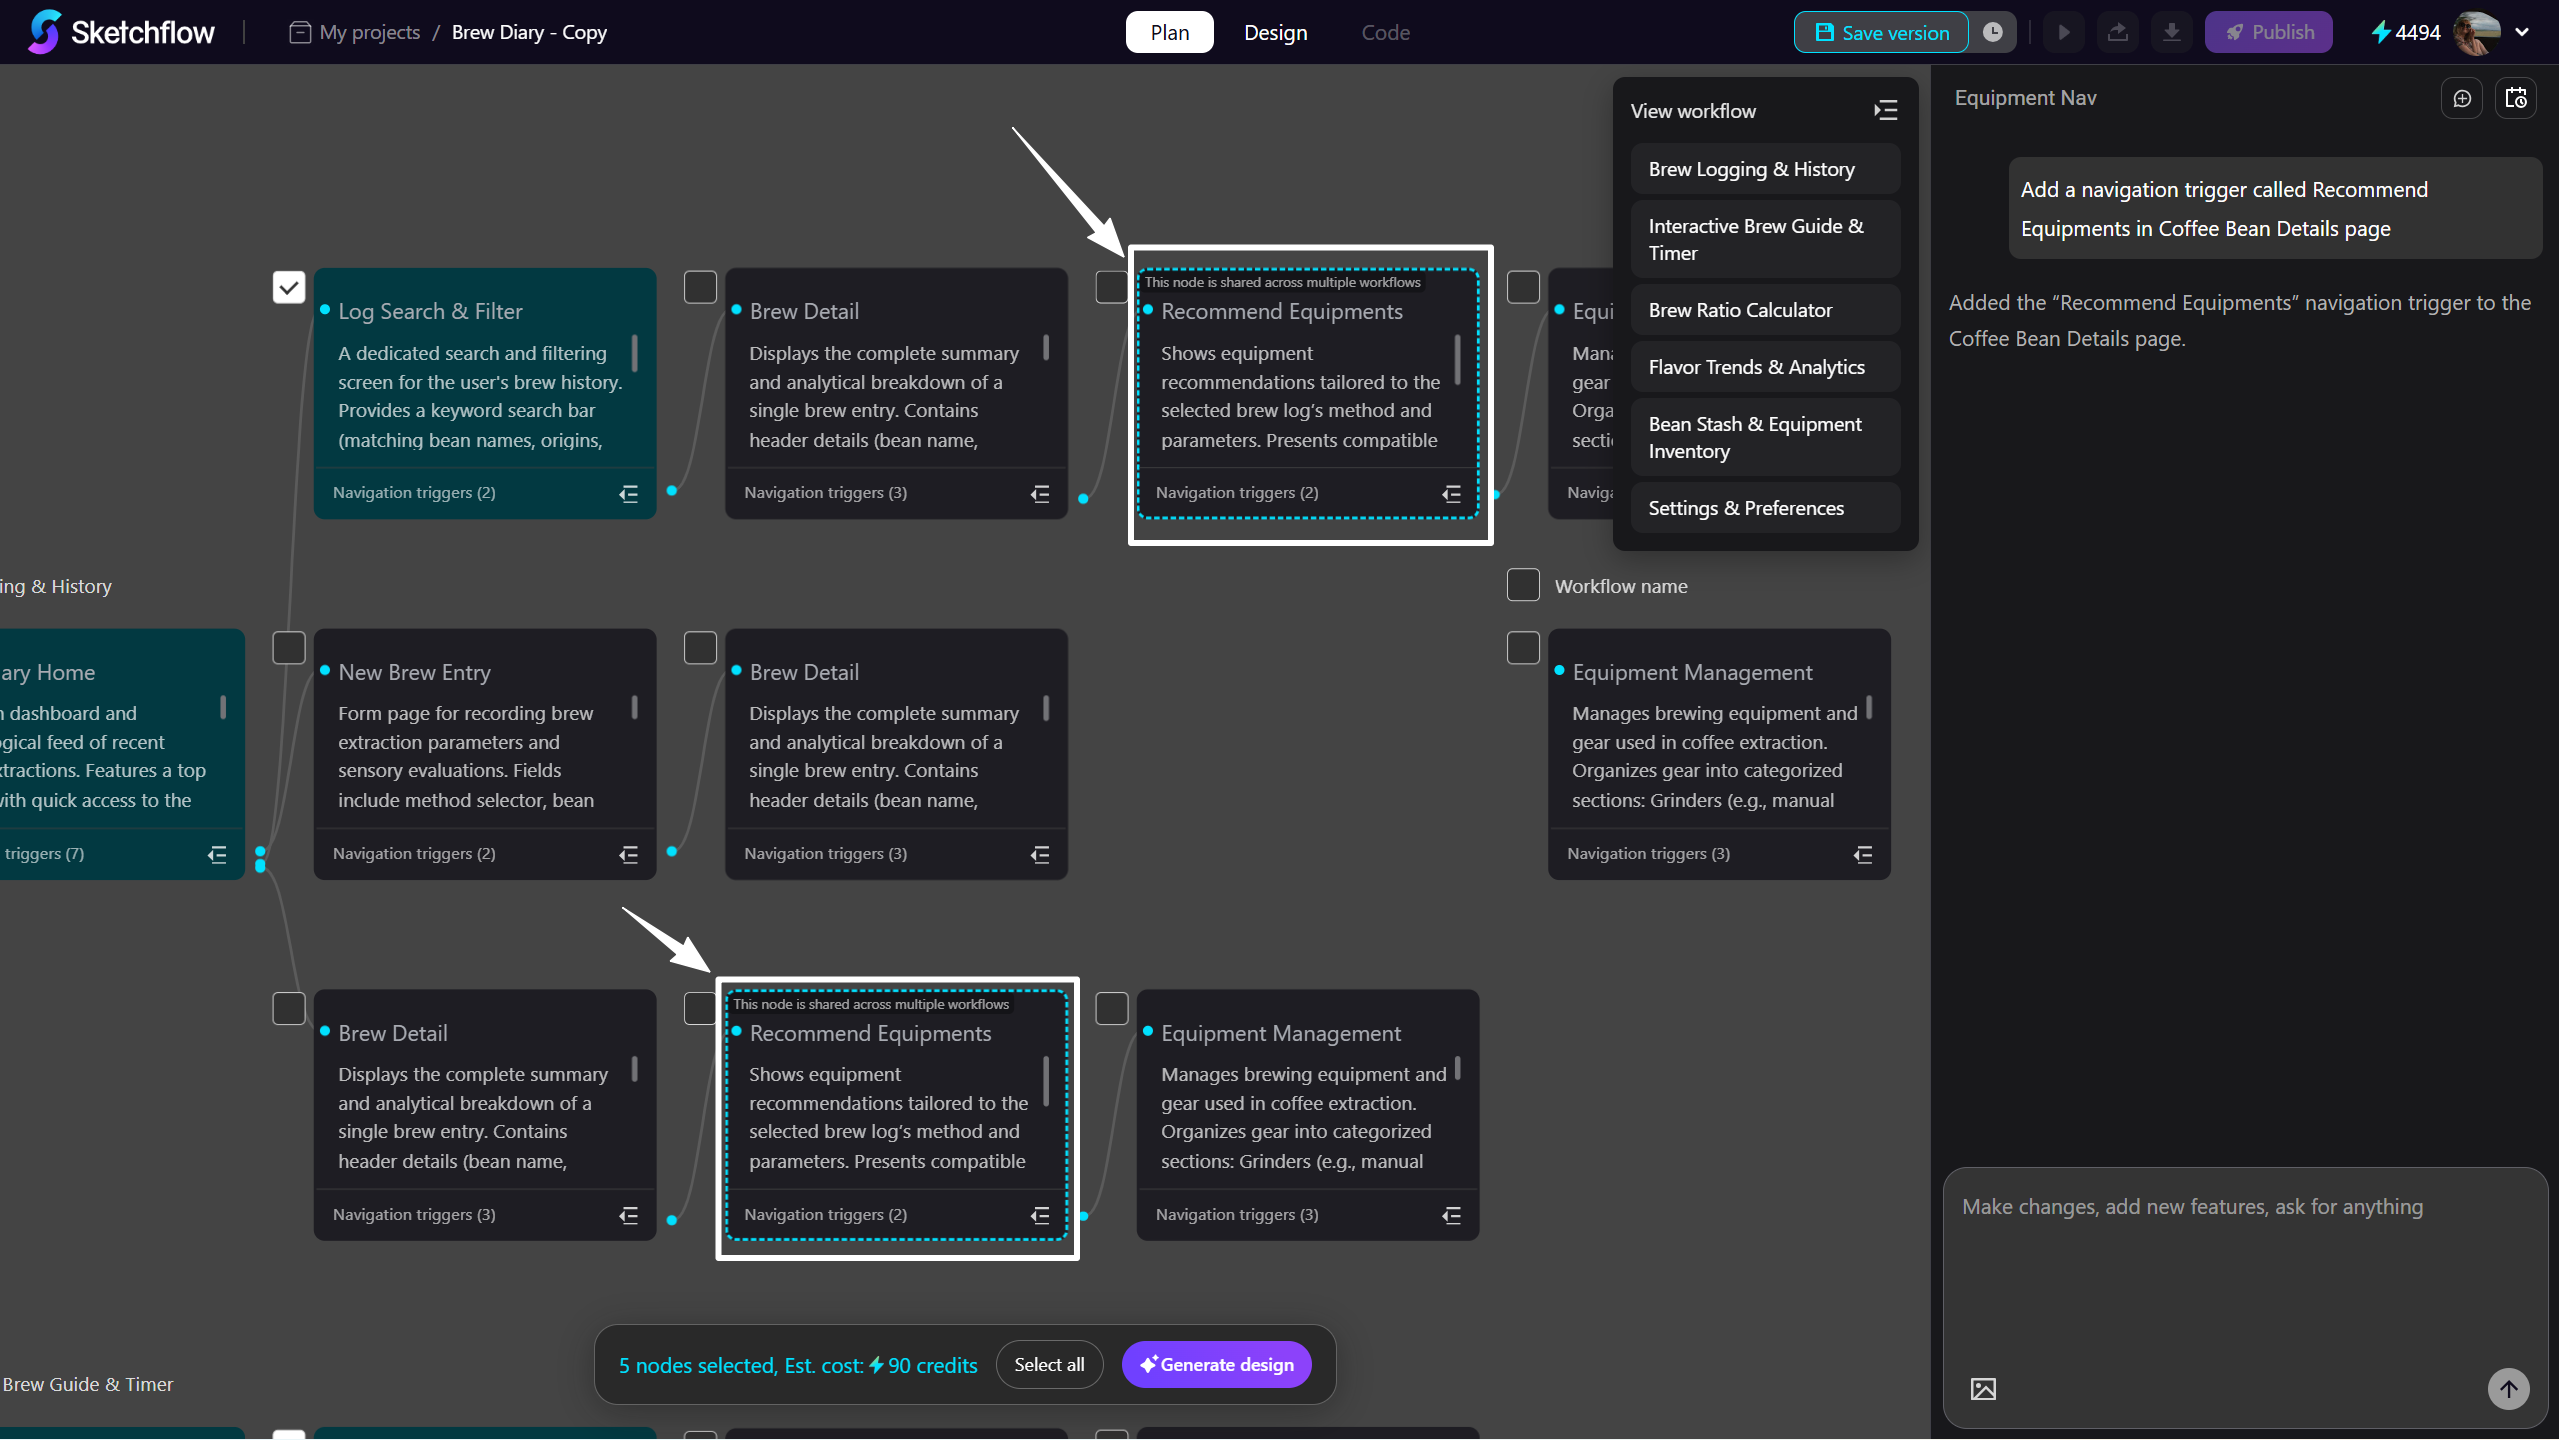
Some pages are shared among multiple user flows. These are outlined with a blue dashed border and a text label.
-
Editing a shared page will affect all instances of that page.
3. Edit and Delete Pages
Each node is a page. Each page contains a name, description and functionality. The generated page will contain the above structure and content.
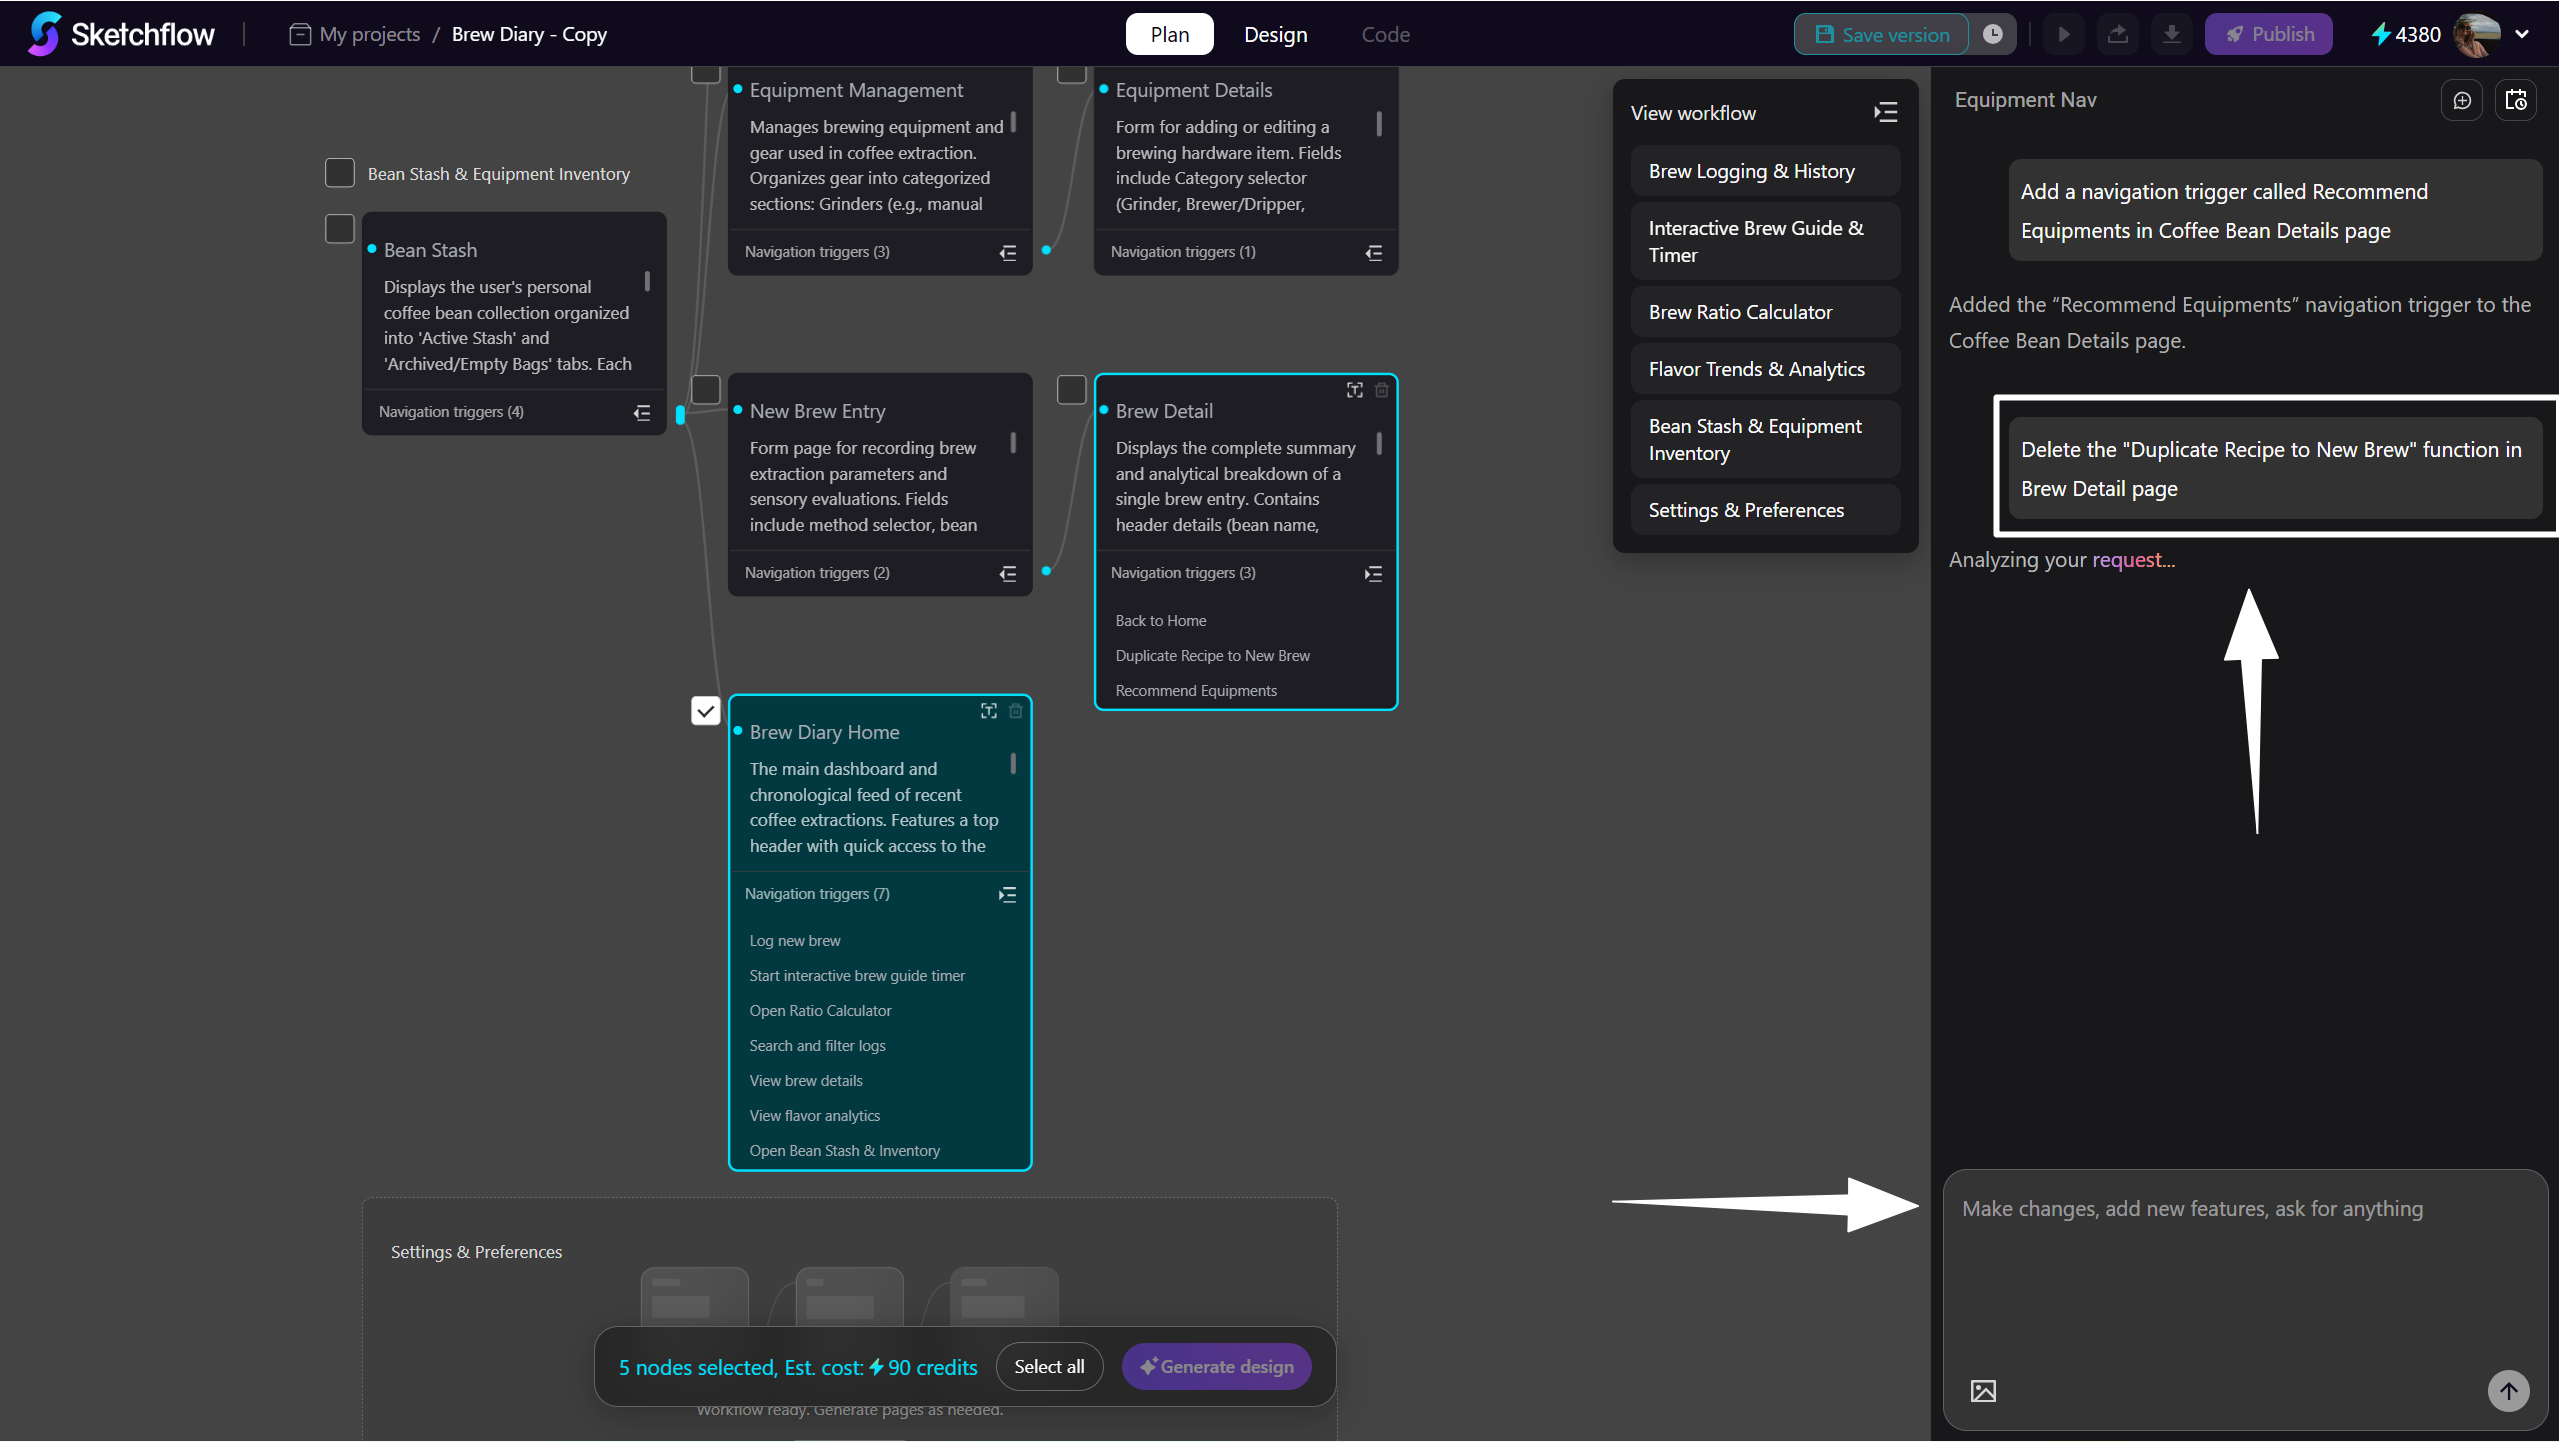
- Modify User Flows in the Chatbox
Describe your ideas or desired changes in the chatbox on the right, and let AI generate or refine your user flow diagram. Use natural language prompts to effortlessly shape your product logic and UX hierarchy.
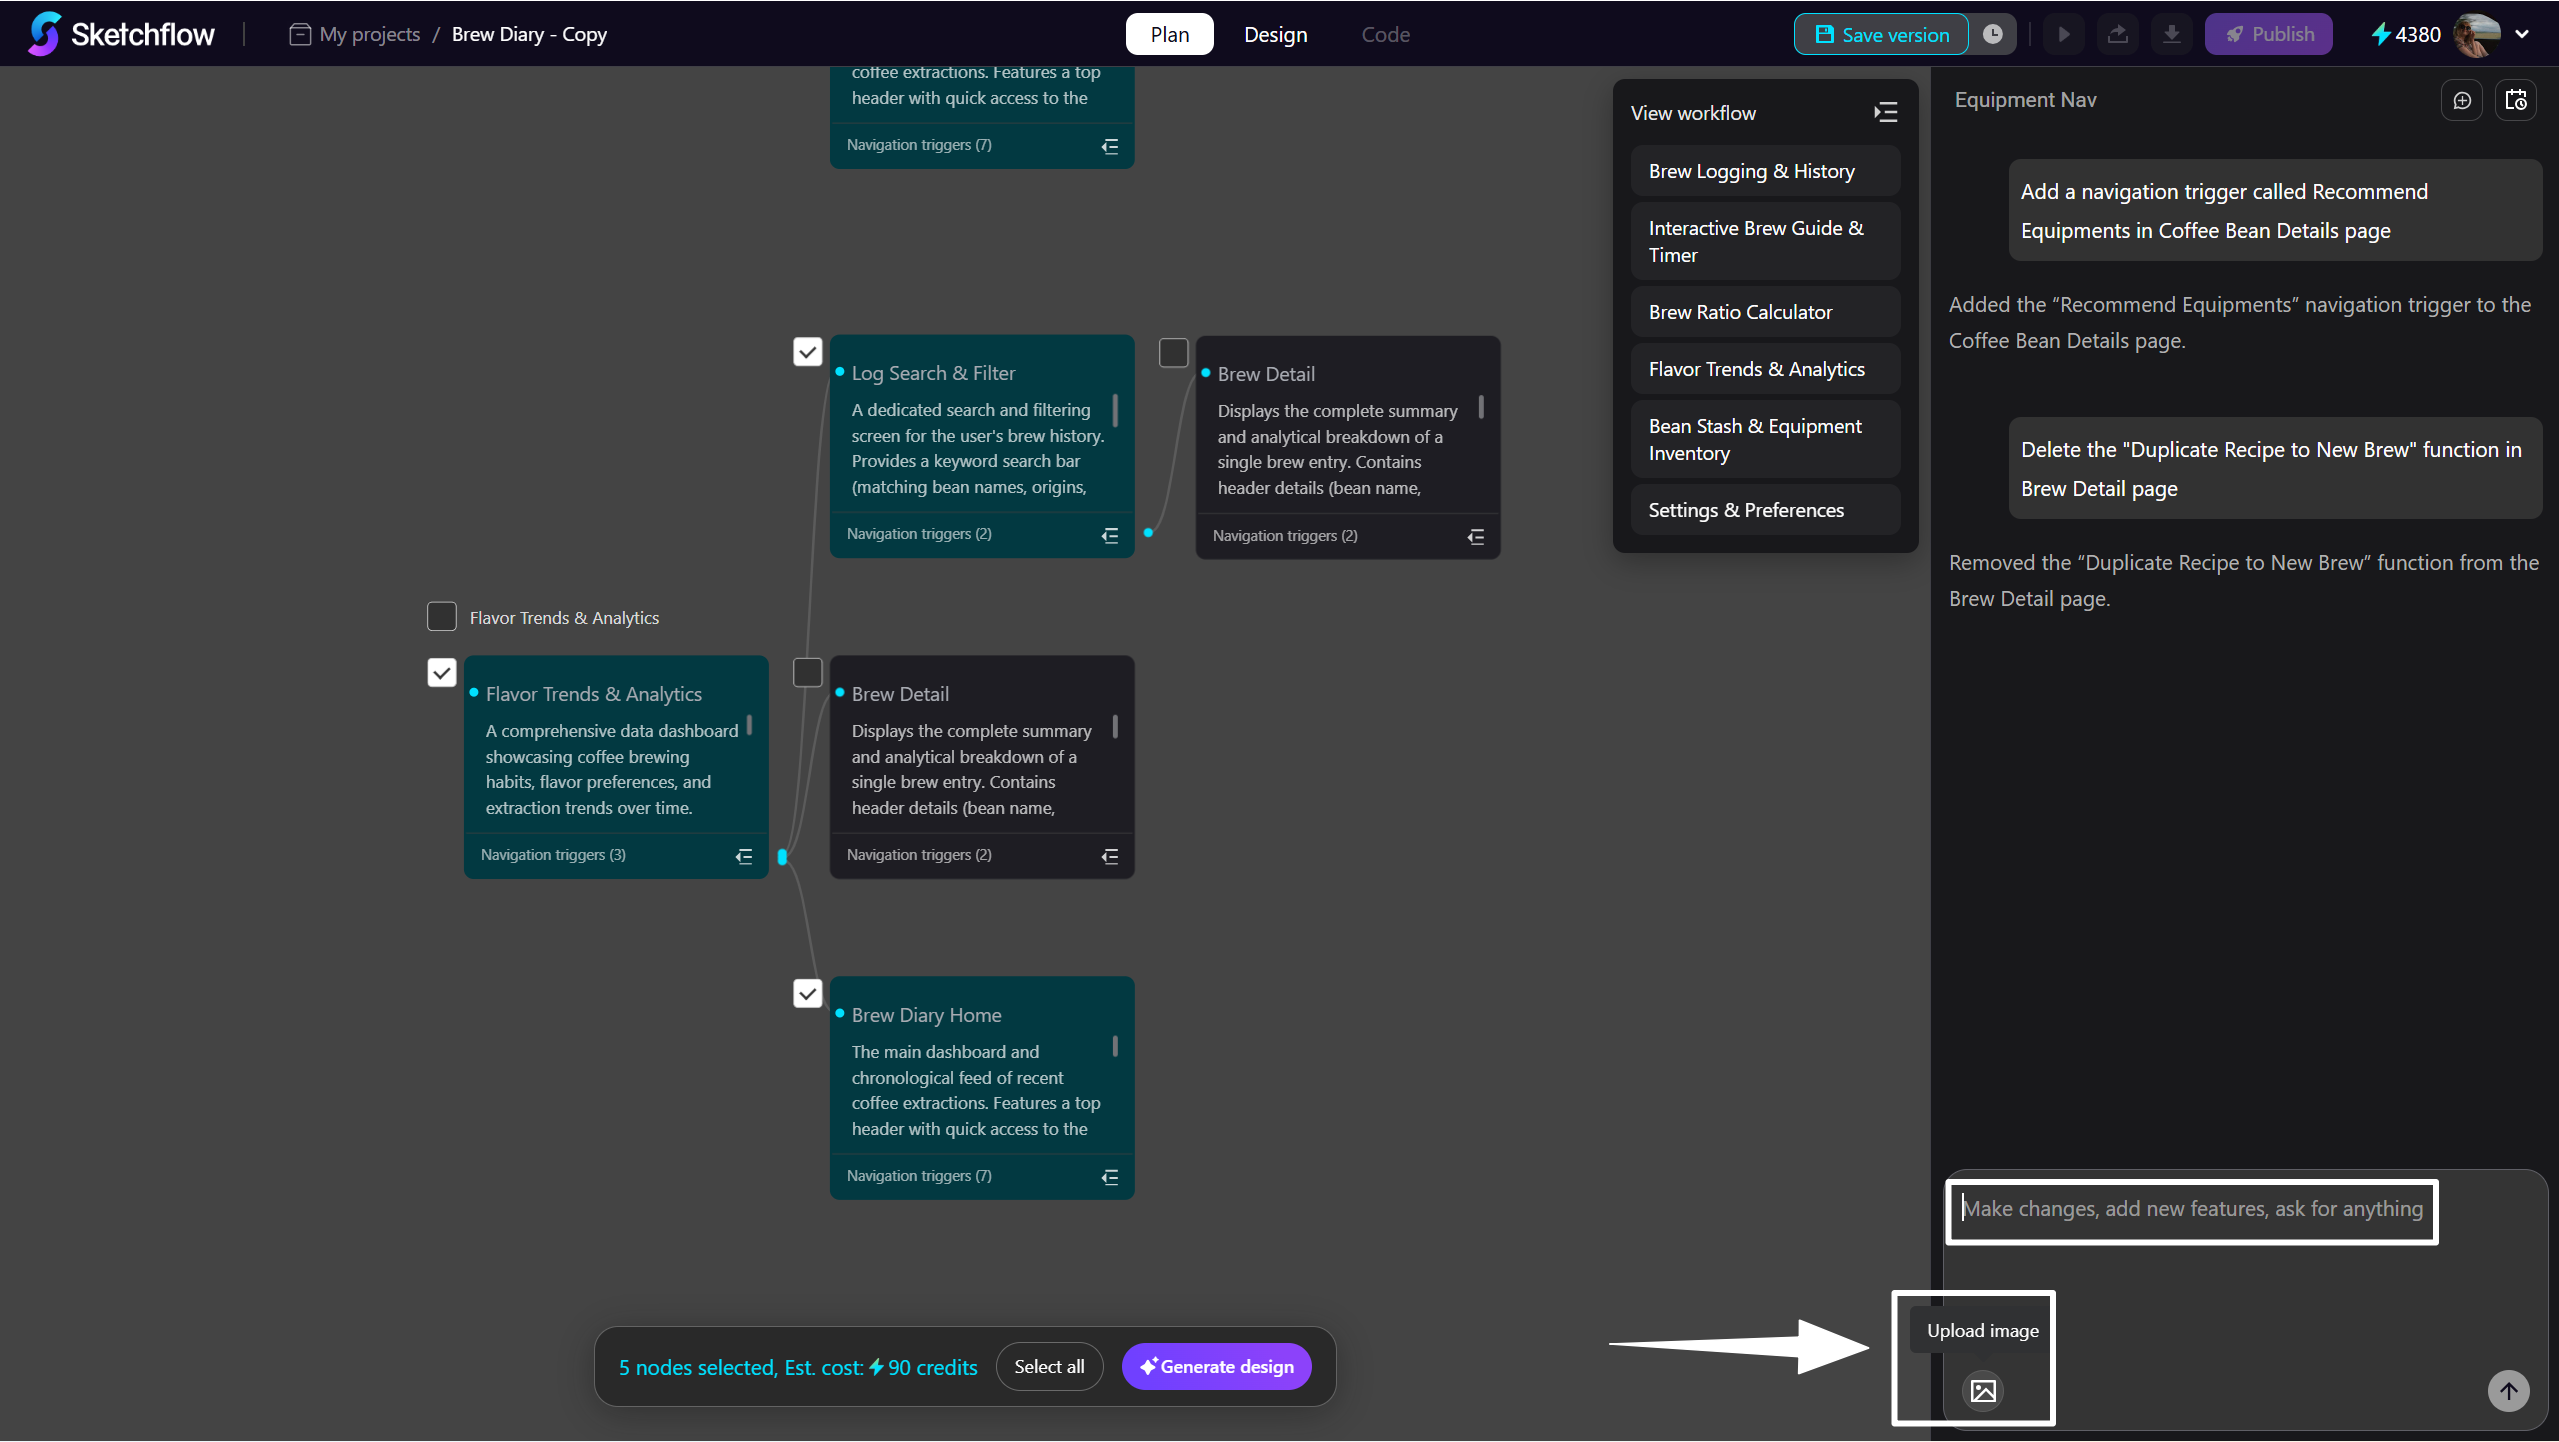
- Modify User Flows with Reference Images
Upload the reference images and add brief description in AI Assistant to generate or modify pages based on your needs.
- Delete the Pages or User Flows
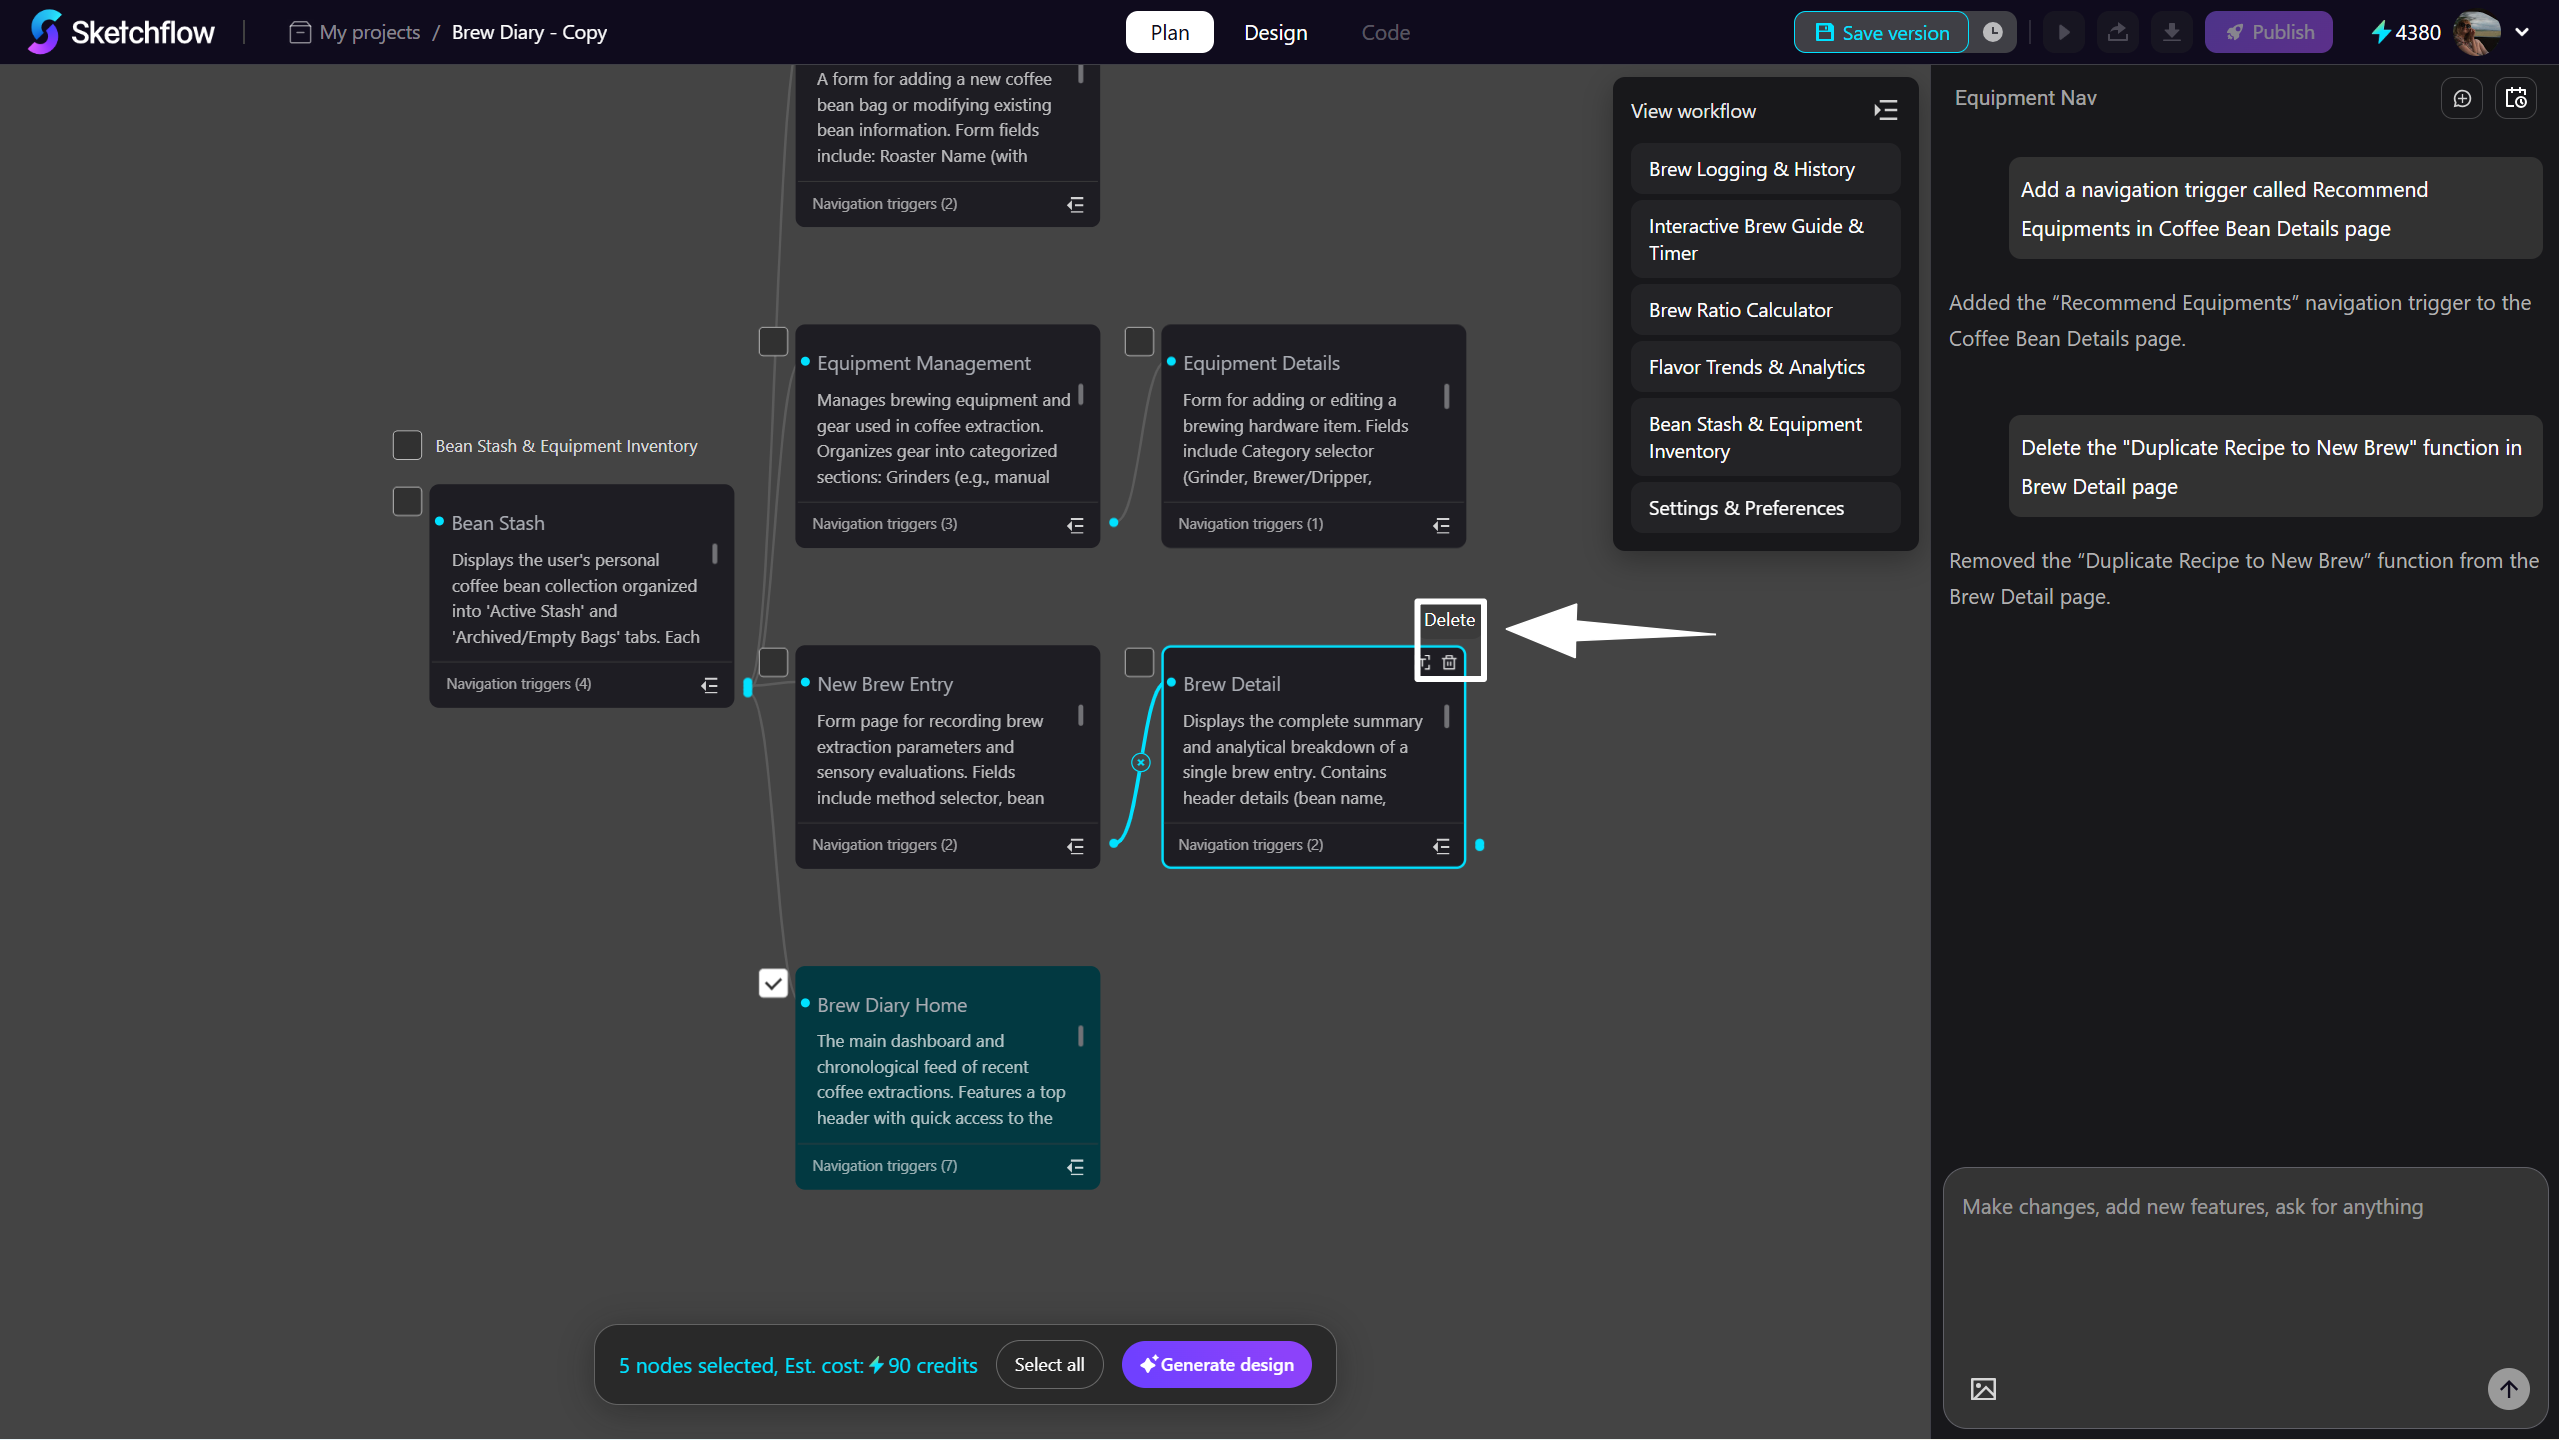
You can also ask the AI to help delete, or manually click the [rubbish bin] to delete one or more pages in the diagram.
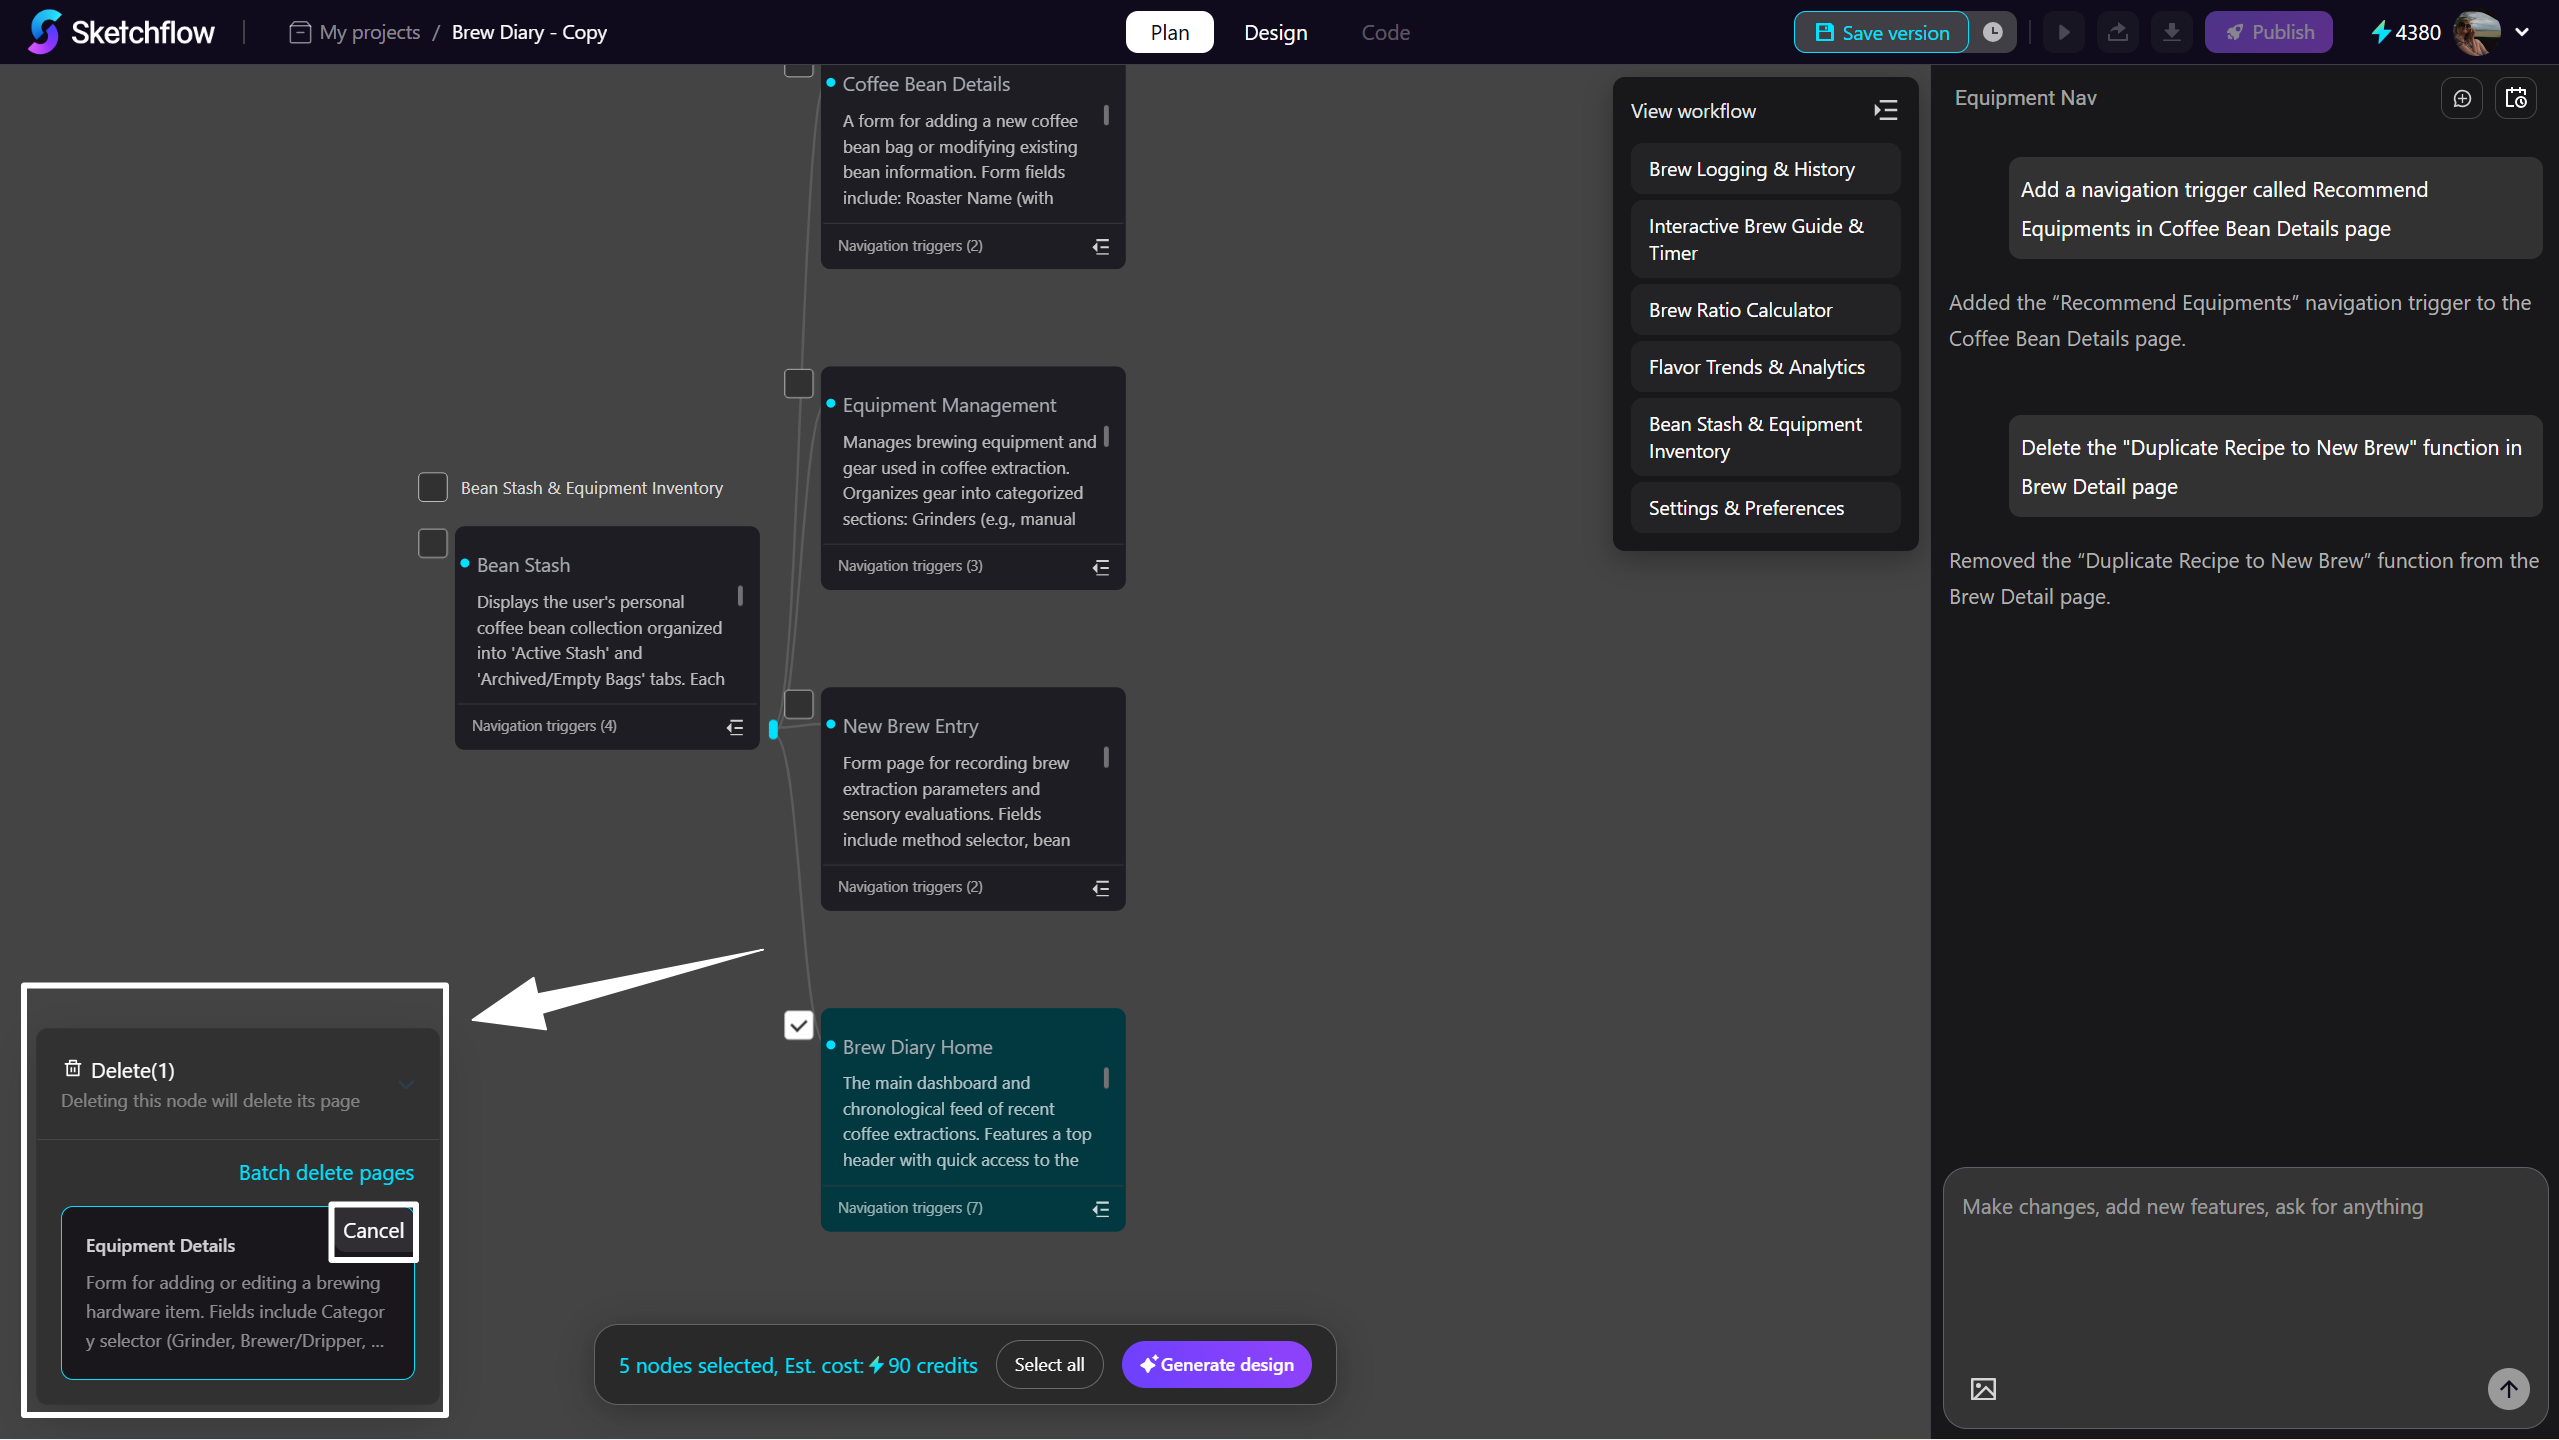
To restore deleted pages, simply expand the floating panel in the lower-left corner and select pages to recover.
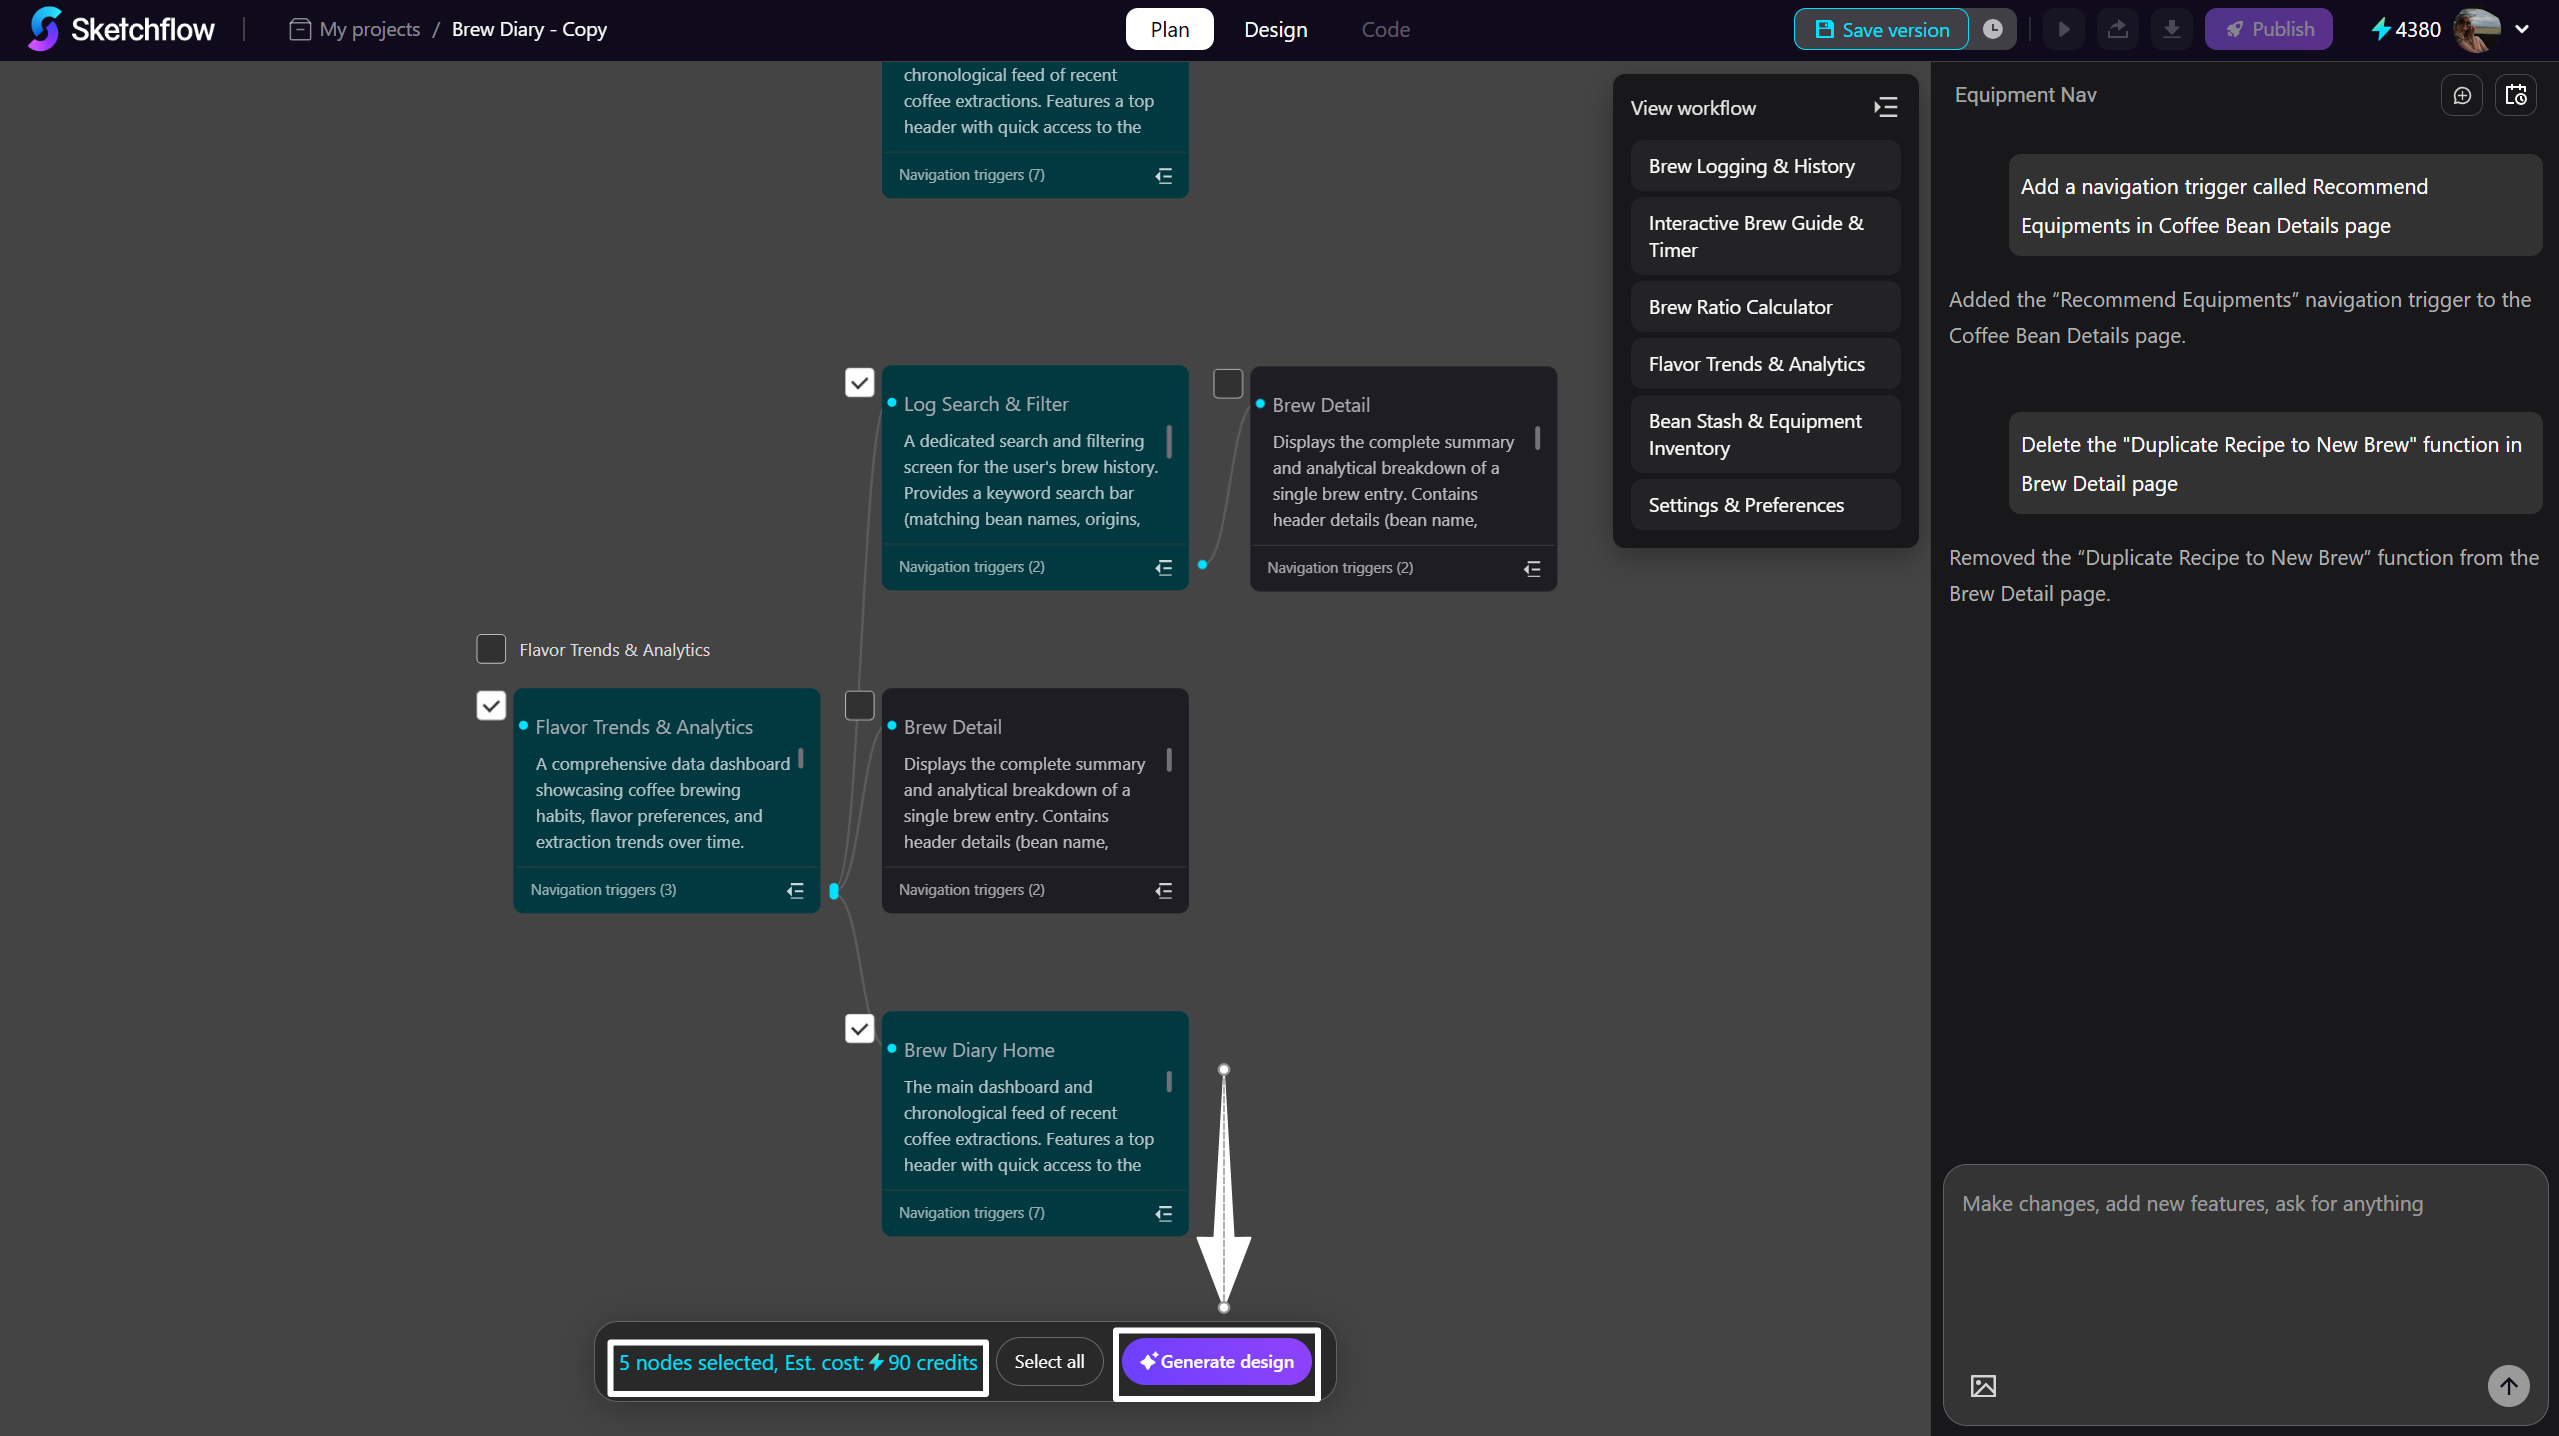
The above are the operations that can be performed in the Plan Mode. When you’re done editing the user flow diagram, click [Generate design] to produce the selected pages.
Notice: Even if a page has already been generated, you can still edit the page content and user flow diagram in the AI chatbox. Any changes made with the AI Assistant are instantly reflected across Plan Mode, Design Mode, and Code Workspace, keeping your product vision, design, and code aligned.